Final project
For the plan of my fabacademy masterpiece, i project to made a Weather forecast.
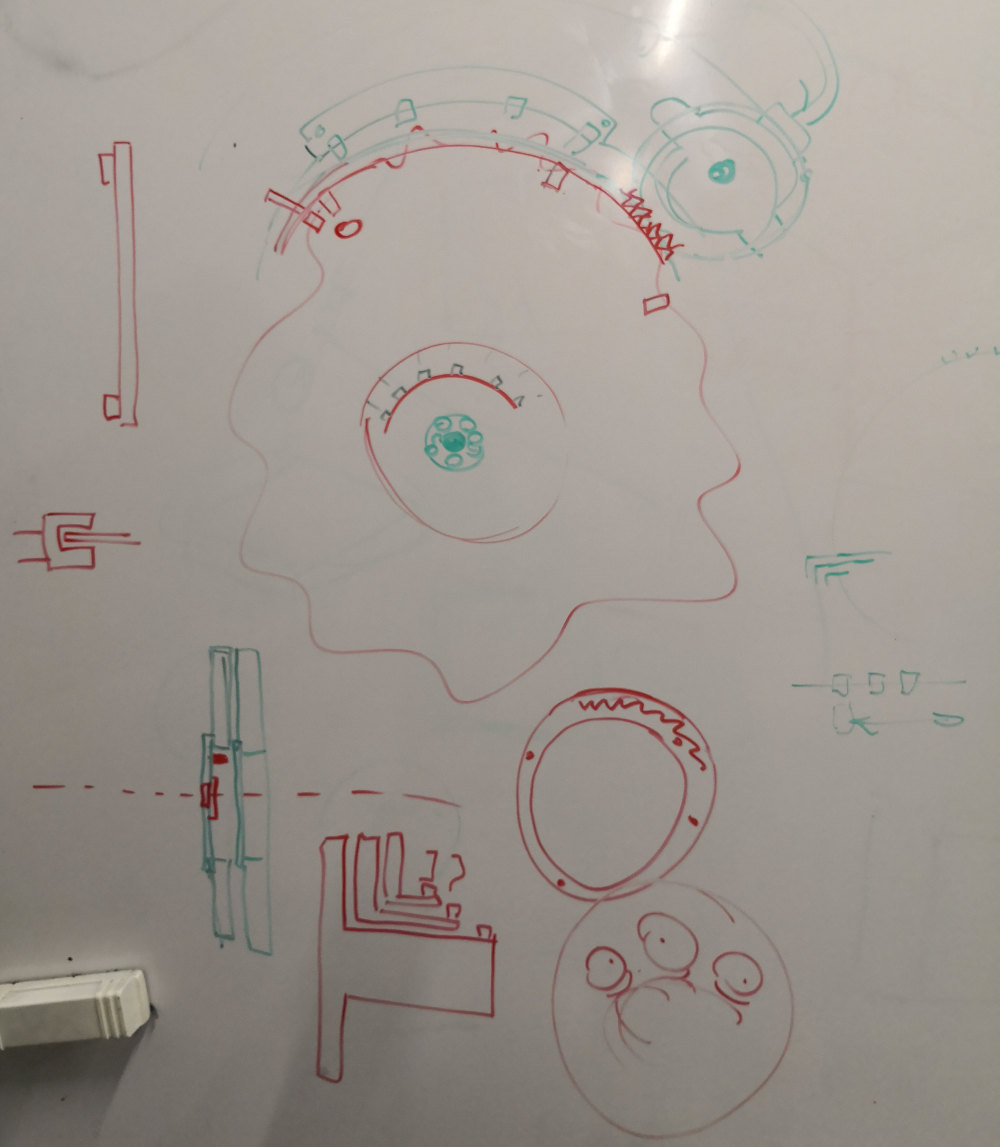
As i explain on week one For my forecast project i want to achieved a mechanical display,
made of 3 plexy wheel changing position when the weather change.
Each wheel should be lighting with LED inspired by the LIXIES project.
The forecast use the Openweathermap API, for taking weather information.
I think of adding a temperature & humidity sensor, for inside house informations.
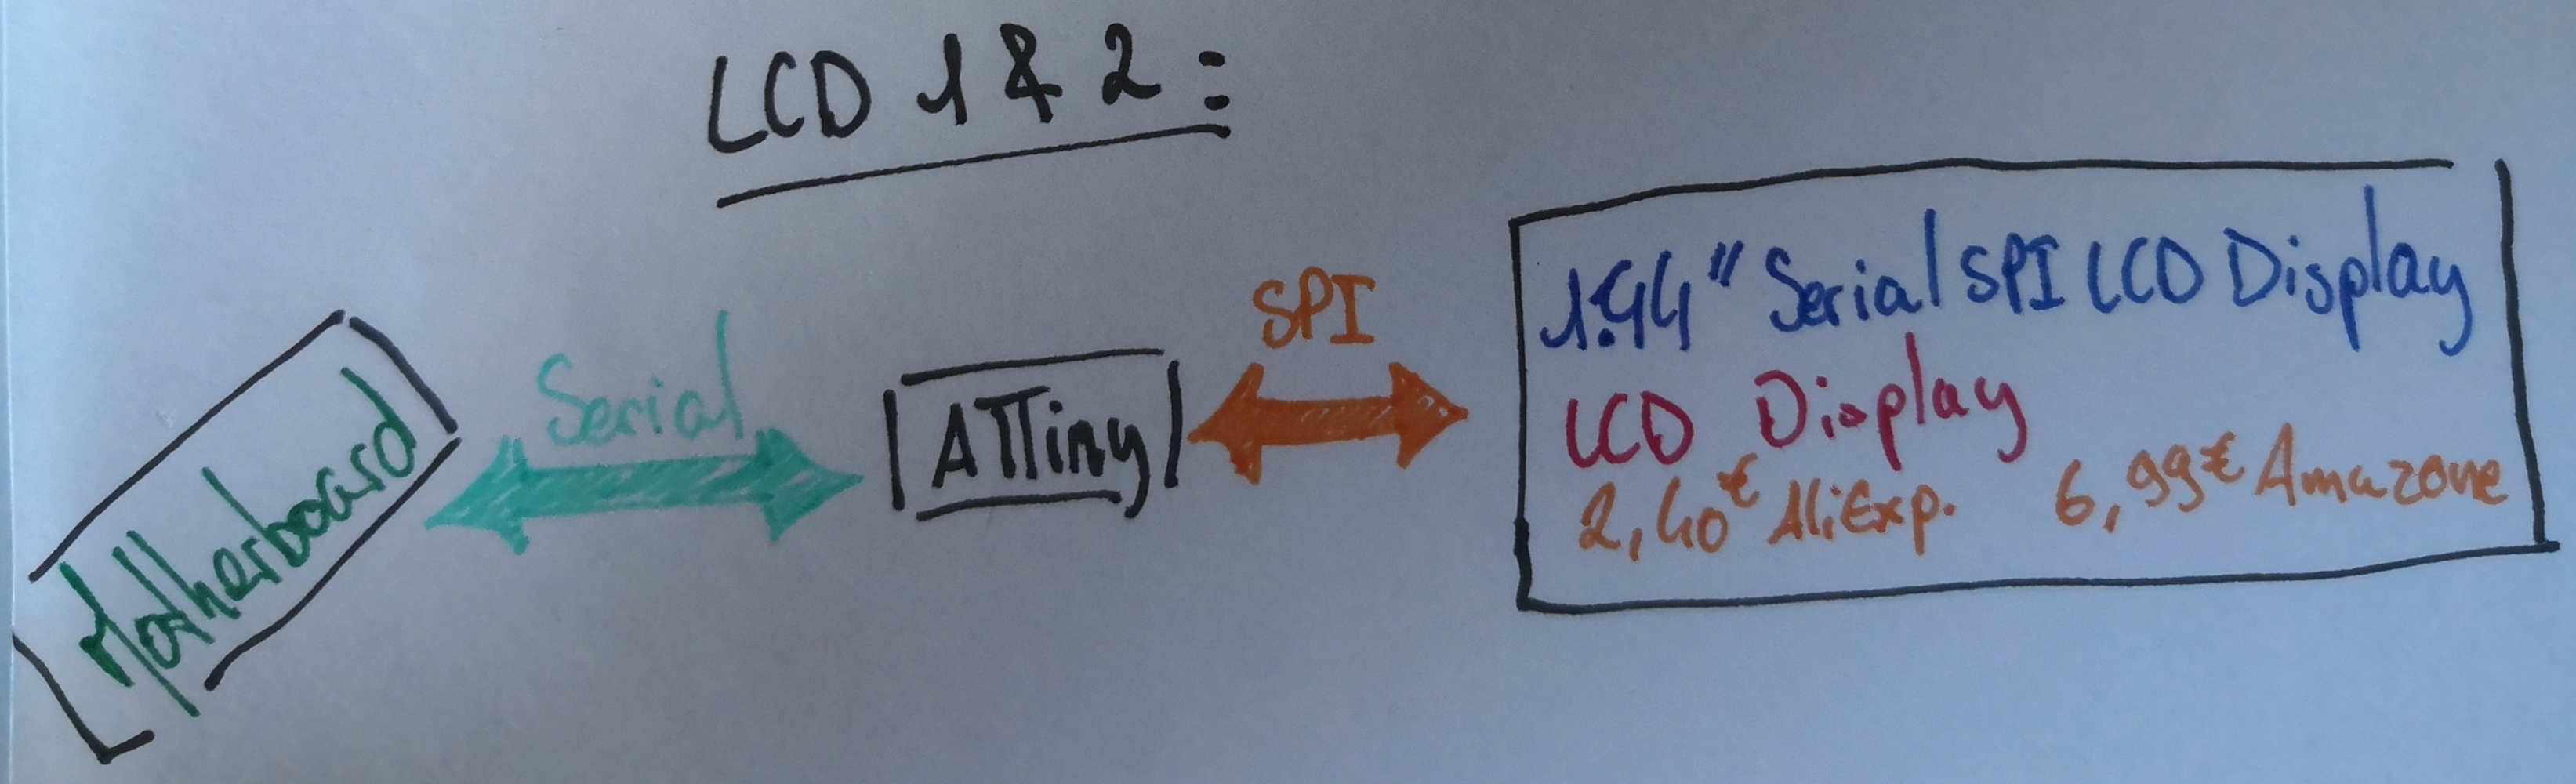
And two LCD display for showing insisde & outside temperature& humidity value.
My objectif is to make as more as possible of this project by myself and have a less premade solution on it.
First Development:
The modelisations of the project i made on week 2:


Week 6:
I talk & work with Adrien, pryor year graduate & mechatronic specialist on the Lab, about my project, and we find a way for the mechanical
part of my project.
I have to define it but now i have a way ^^
After many reflexions i want to use a ESP as my microcontroller & 3 28BYJ-48 stepper
Week 10:
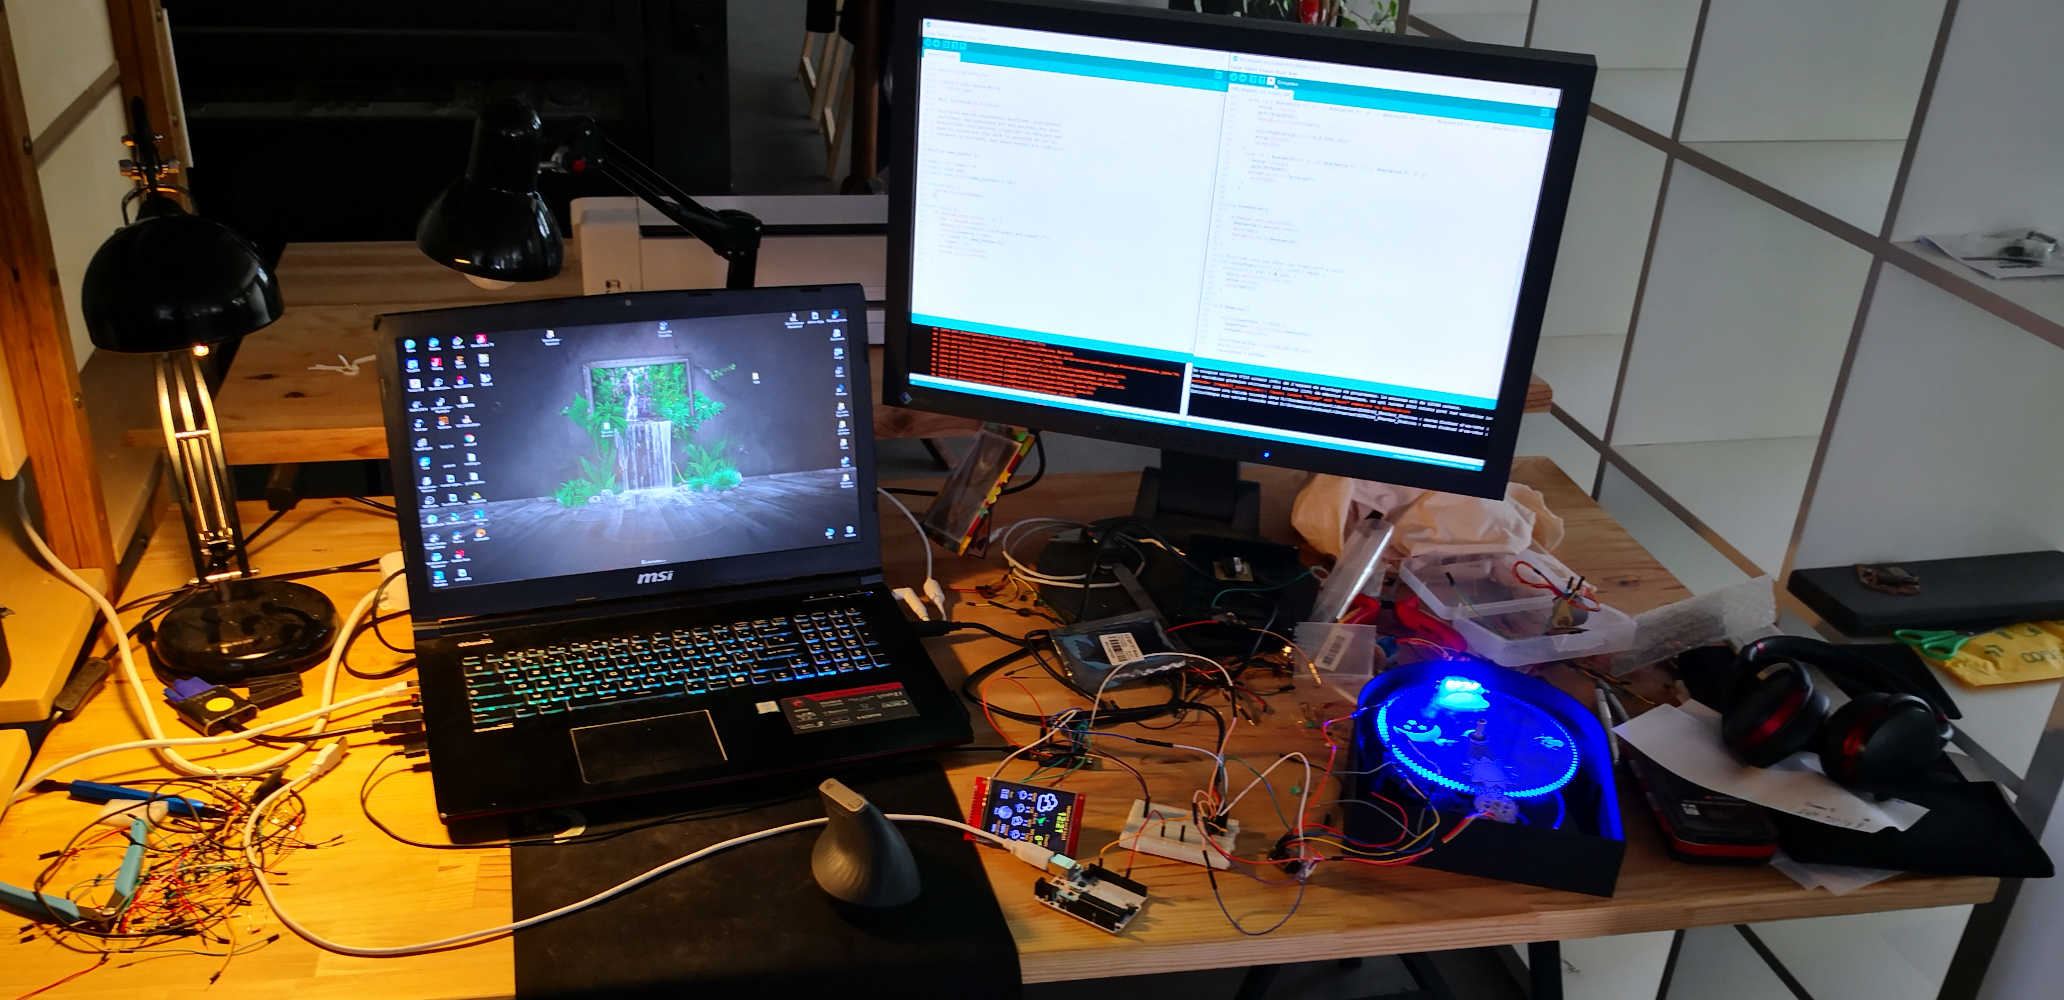
This week, i spend a really good time using all the previous learned skills to devlop my final project:
I start by making a functional scheme for clarify my idea on "how i could do"my project.
I also schematize how i want all my modules communicates together.
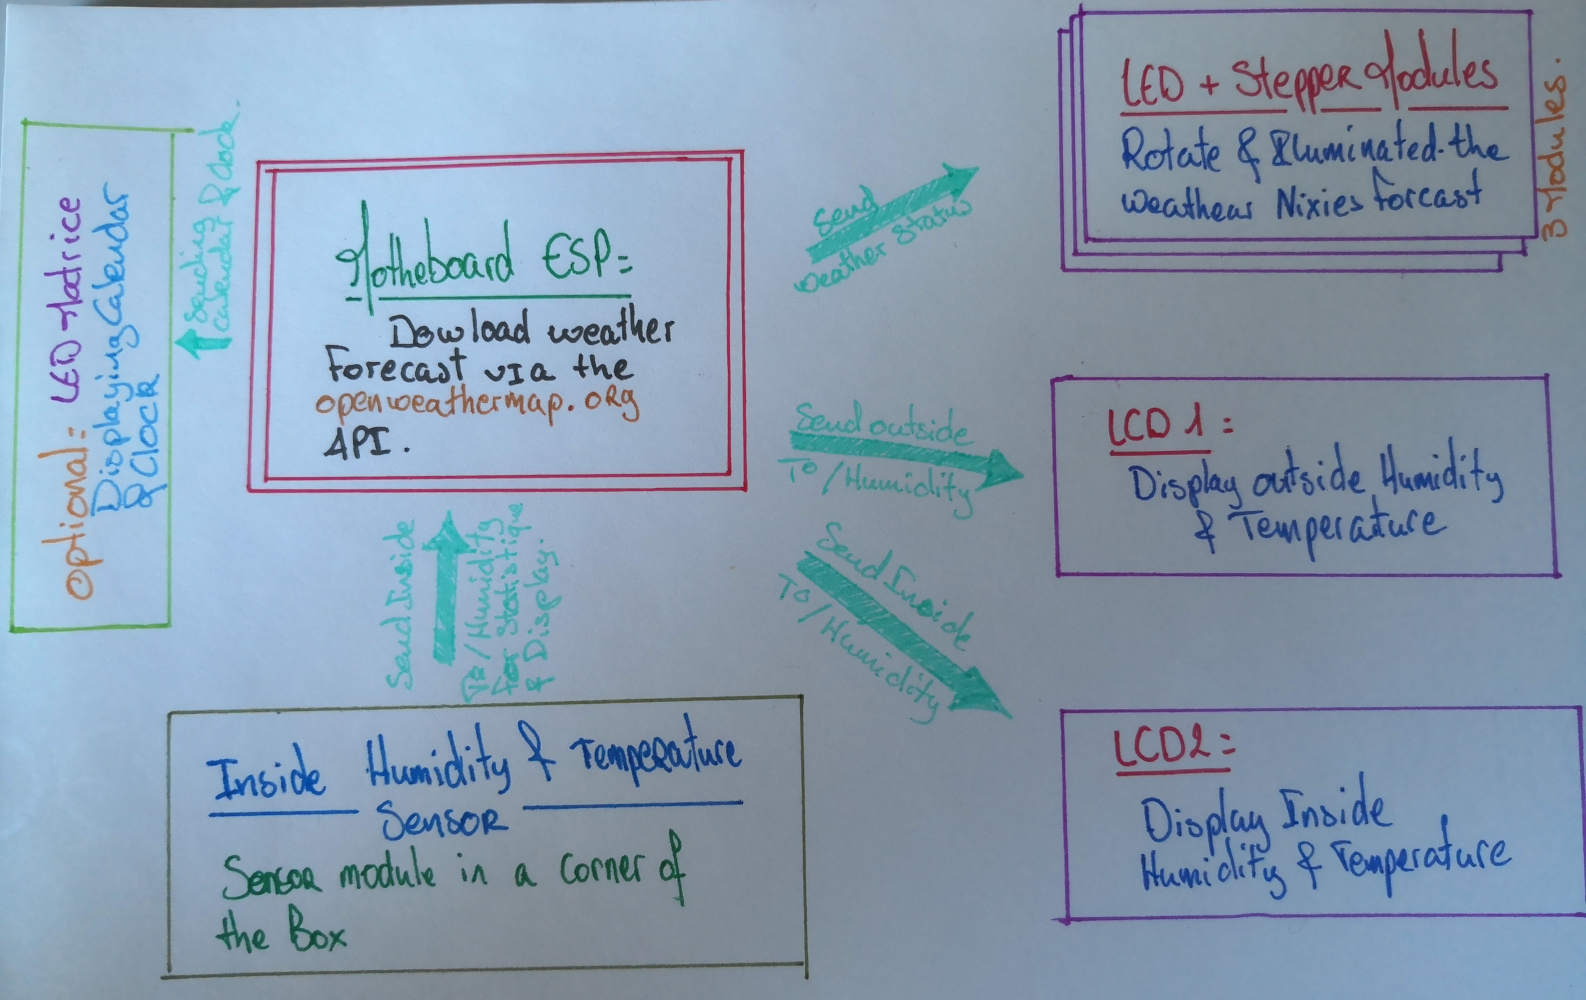
All this schem permit me to prepare correctly the design of my different board on eagle:
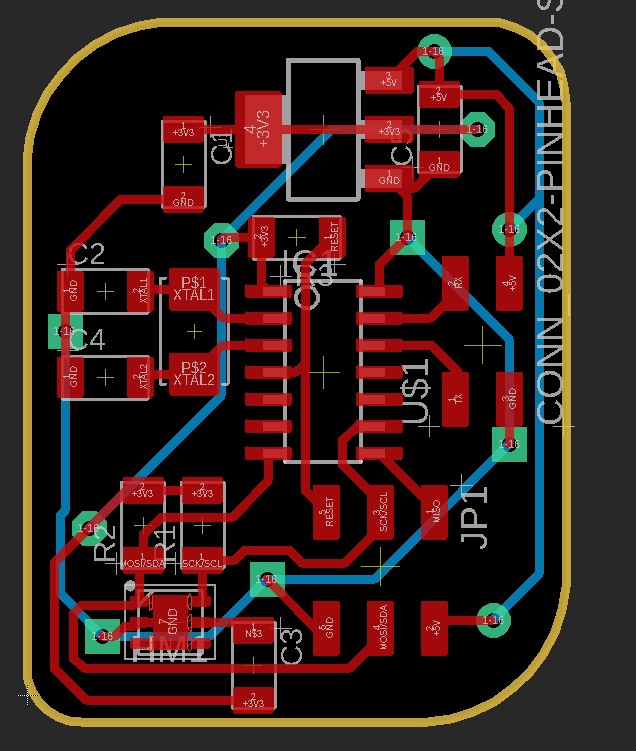
The ESP main schem & board.
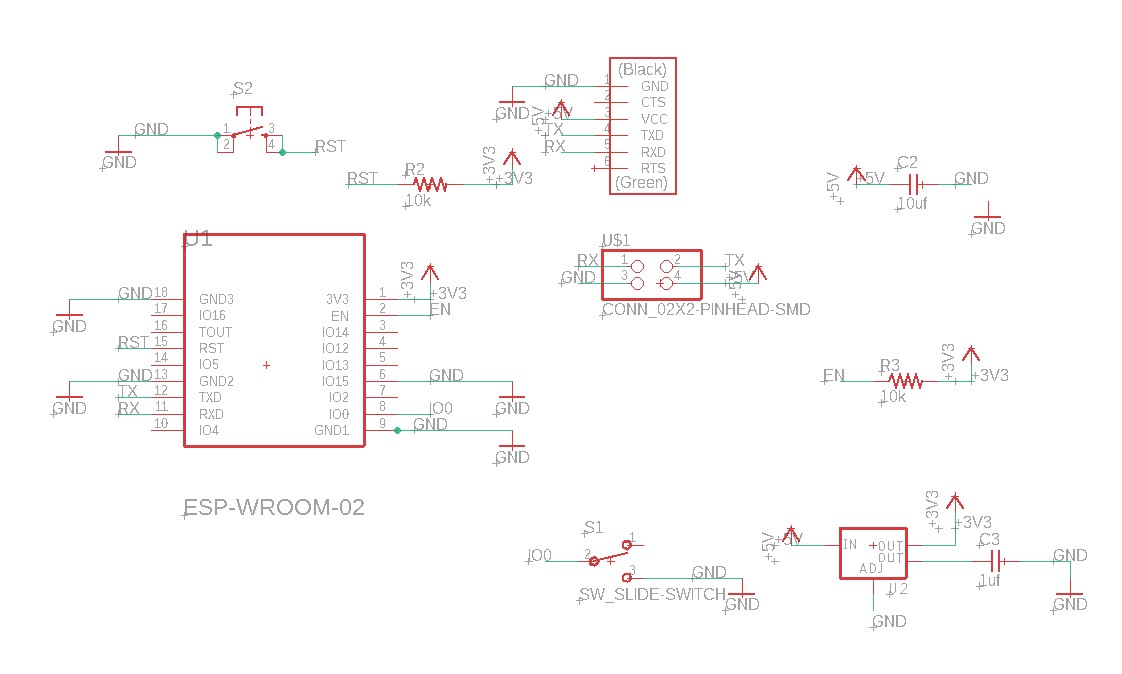
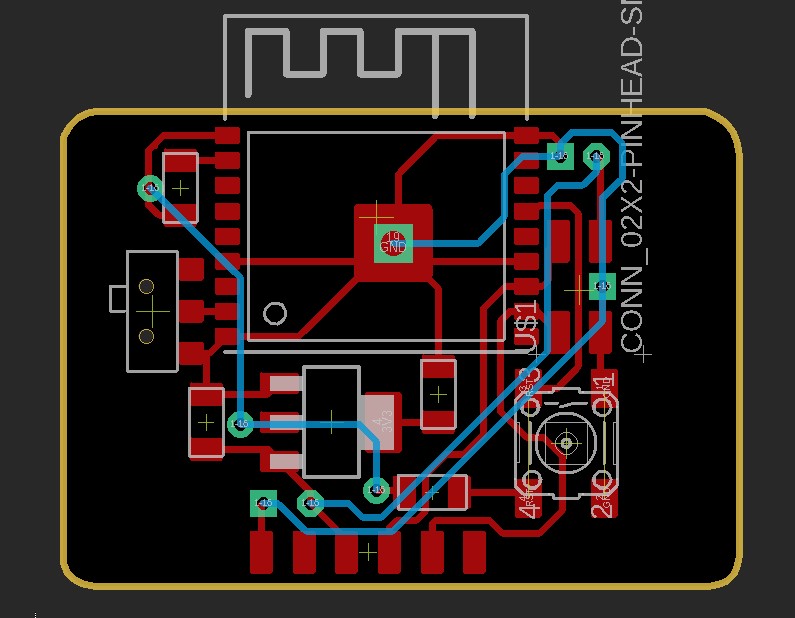
It's design to be the master board of the project, the ESP connected on wifi received the forecast API & send instruction to other board on a serial communication.
On the design i have a switch for programming or running position, a reset button, the ESP, a regulator (the ESP run on 3V3 & my circuit is on 5V).
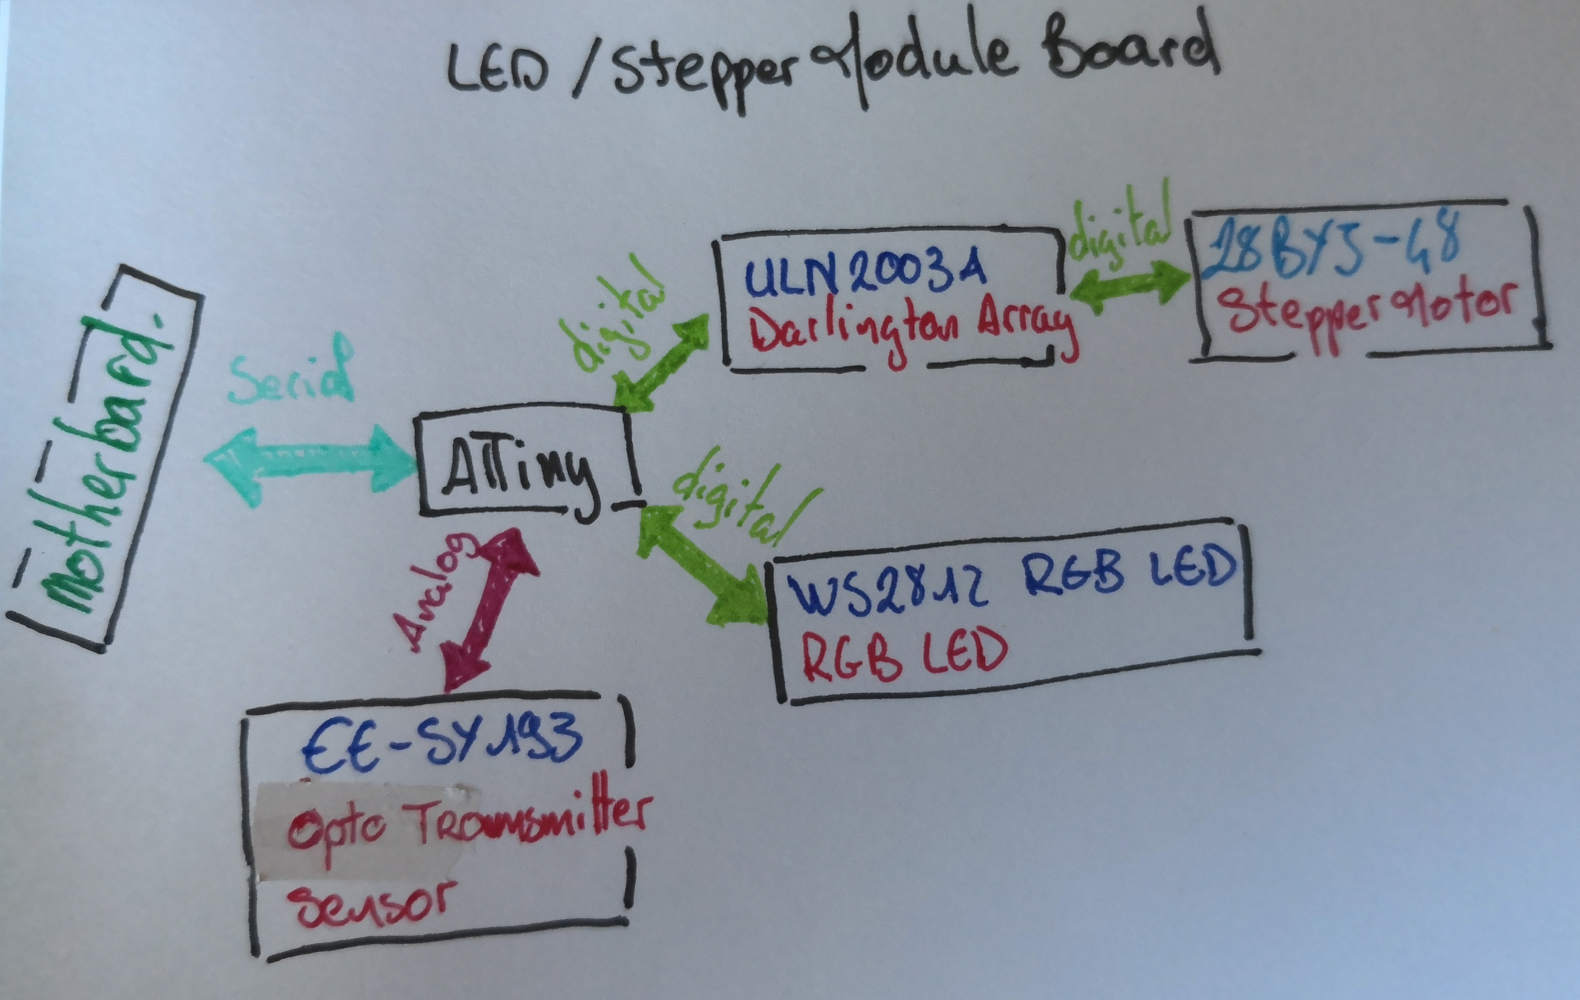
The Stepper & LEDs modules control schem & board.
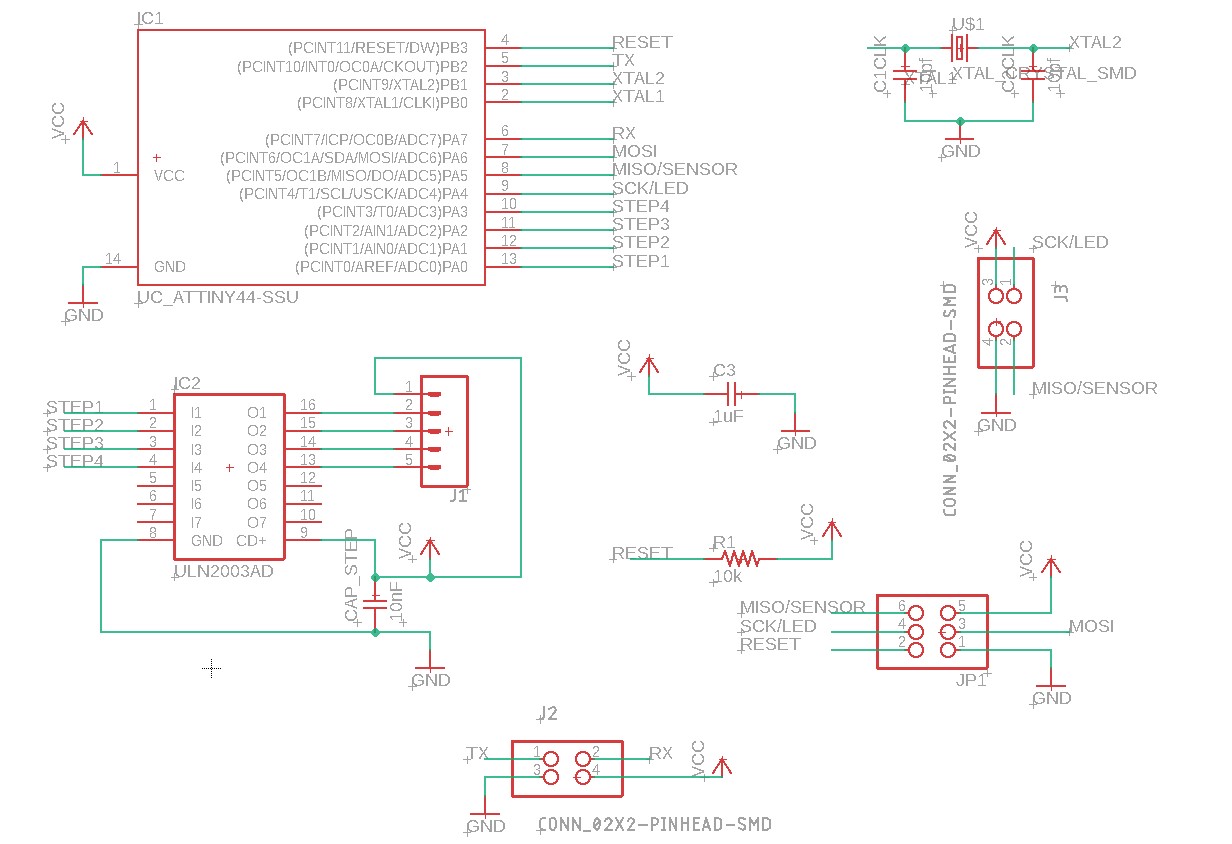
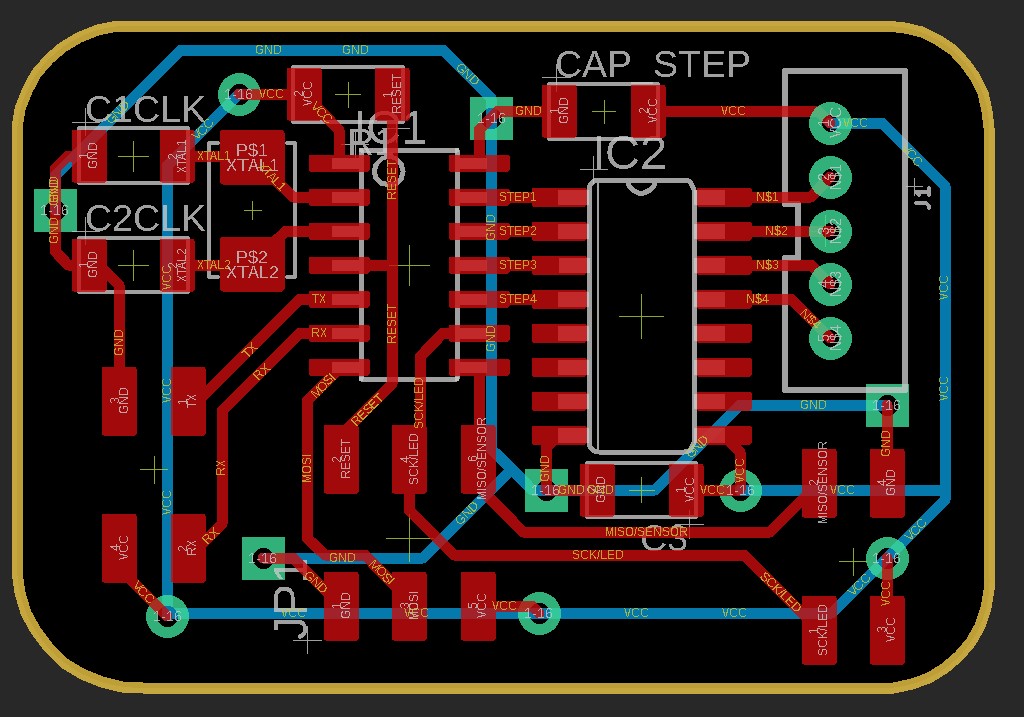
All the slave modules run on ATtiny44, this one have a ULN2003 darlington transistor to amplify the stepper control signal.
The stepper and the LEDs systeme connect directly on this board.
the LED subsystem schem & board.
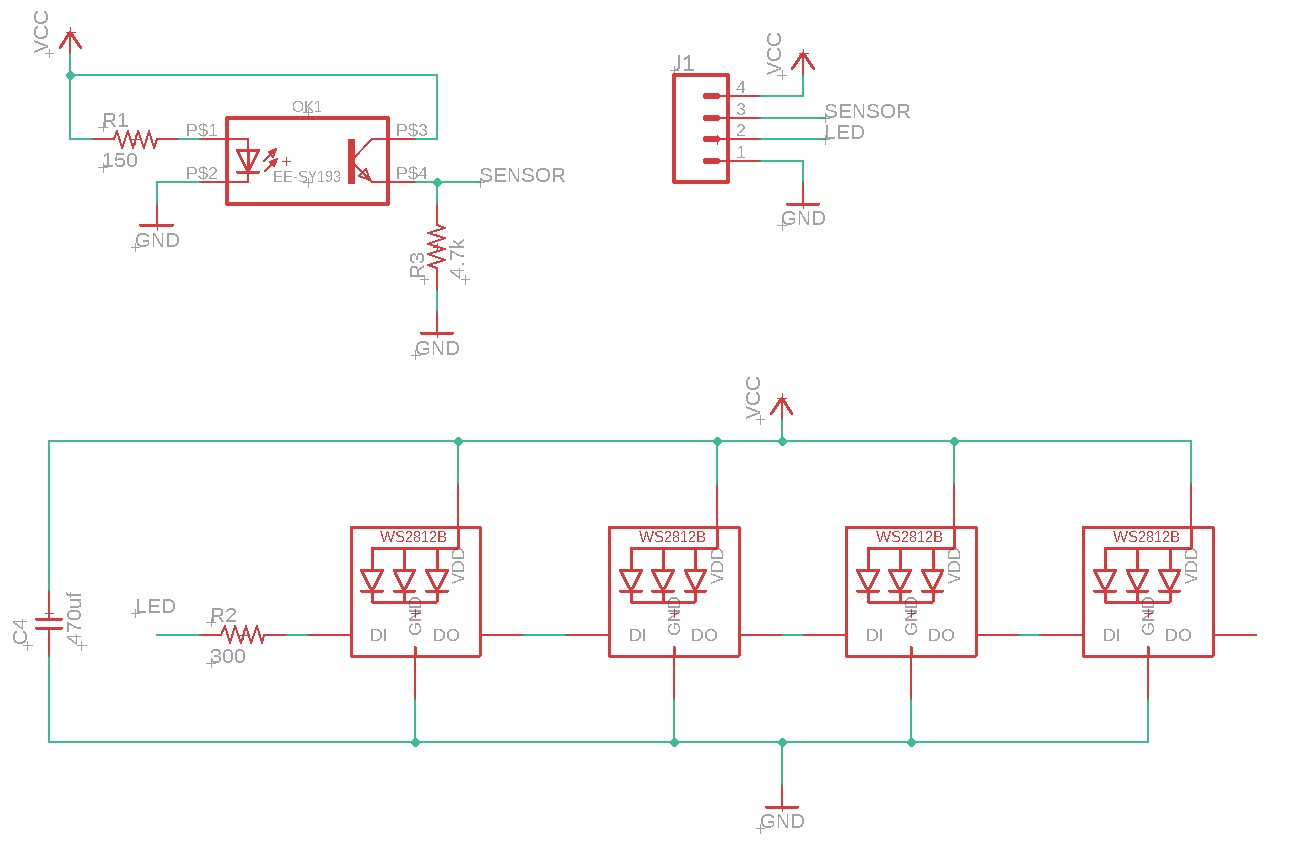
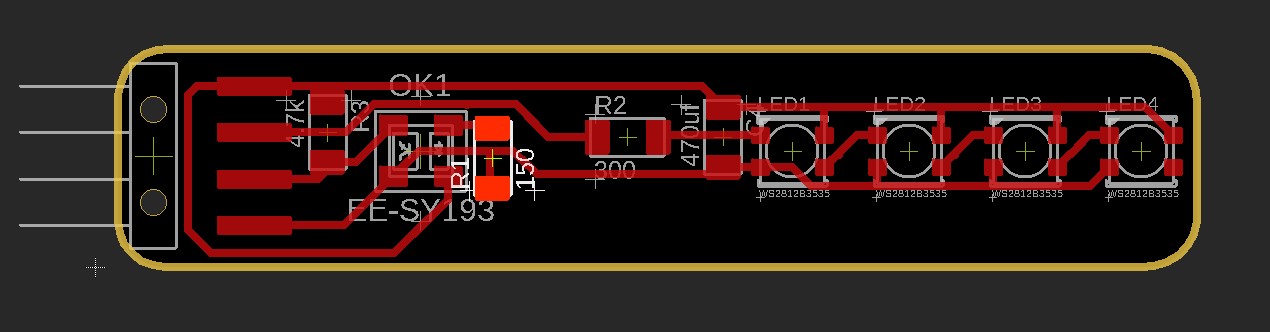
This board is design to be connect to the stepper contol board.
on my final project i want to make it on flexible pcb systeme for follow the plexy gear form.
It's compose by 4 WS2812B RGB LEDs & a EE-SY193 reflective photosensor for a nice stepper
indection.
Temperature & humidity sensor schem & board.
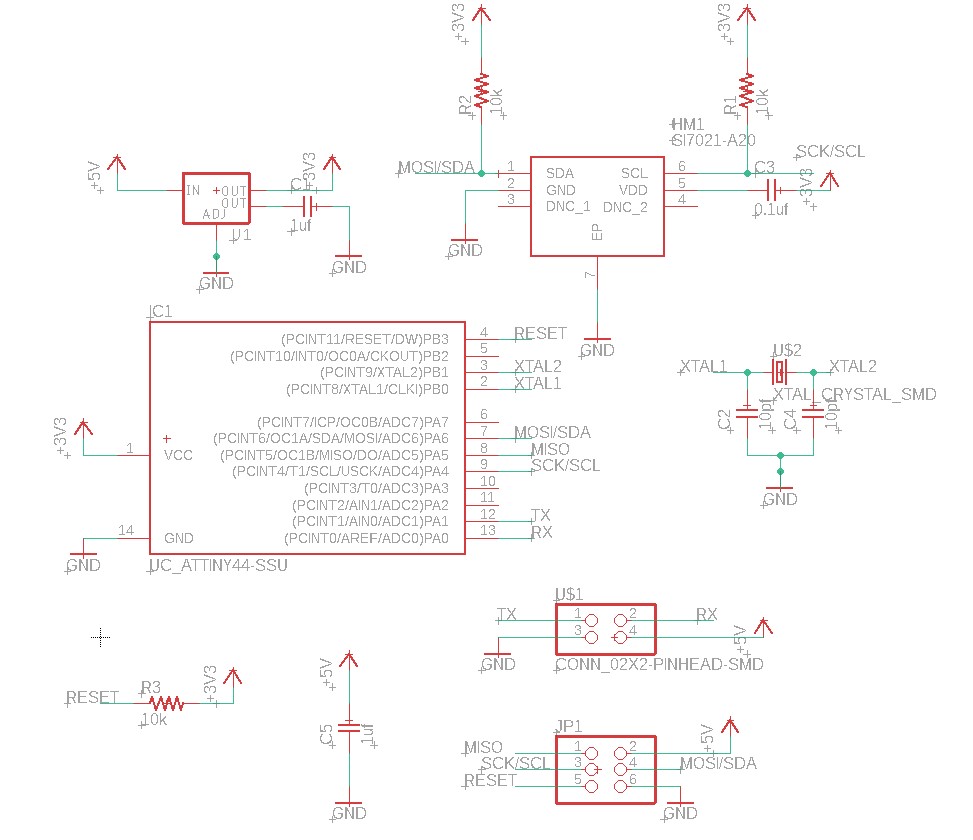
On this board i want to use the Si7020-A20 I2C humidity & temperature Sensor.
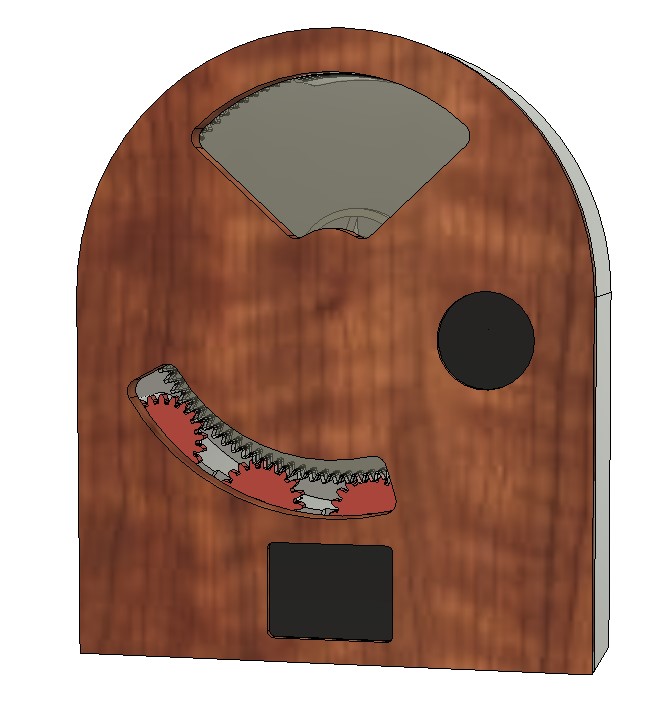
I also progress on my final design.
The final design of the project have also take a lot of amelioration, with integration of the stepper / board / gear & ballring, that start to loocking nice ^^.

Final Development:
During the quarantine i develop a lot my design and the final version of my project:
Assembly files : Here
♦electronic Parts & Coding:
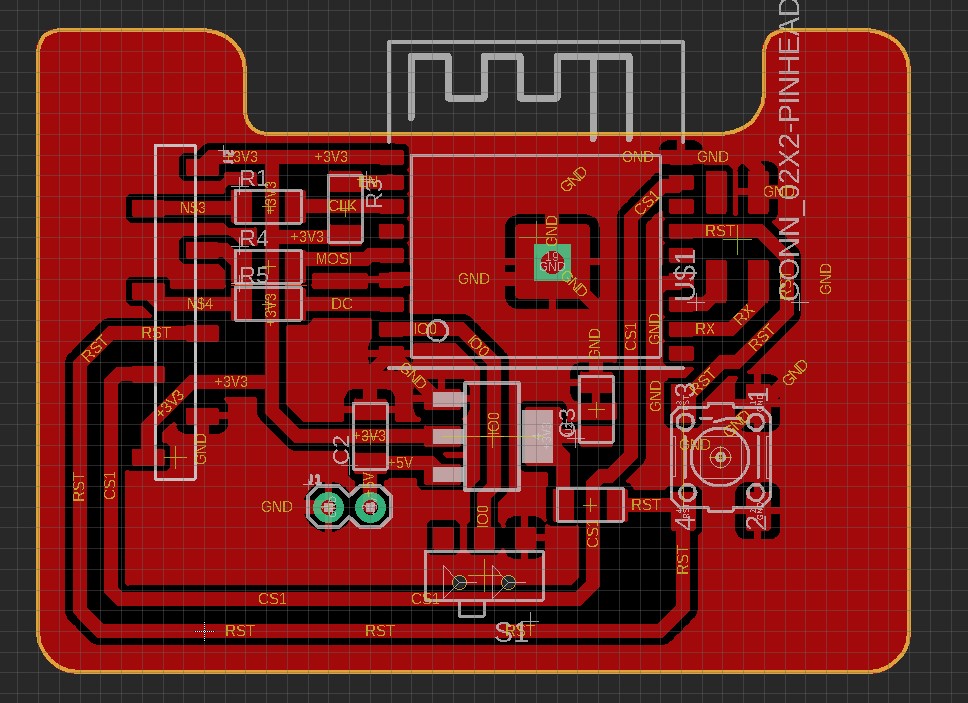
= ESP 8266 aka THE MOTHERBOARD =
This Board is the most important one of the project, it connect via WiFi to the Openweathermap API to collecte all the forecast information i'm gonna use for my project.
The change i made from the first design to the final one:
- deleted the FTDI pins ( i just need a RX & TX to program it)
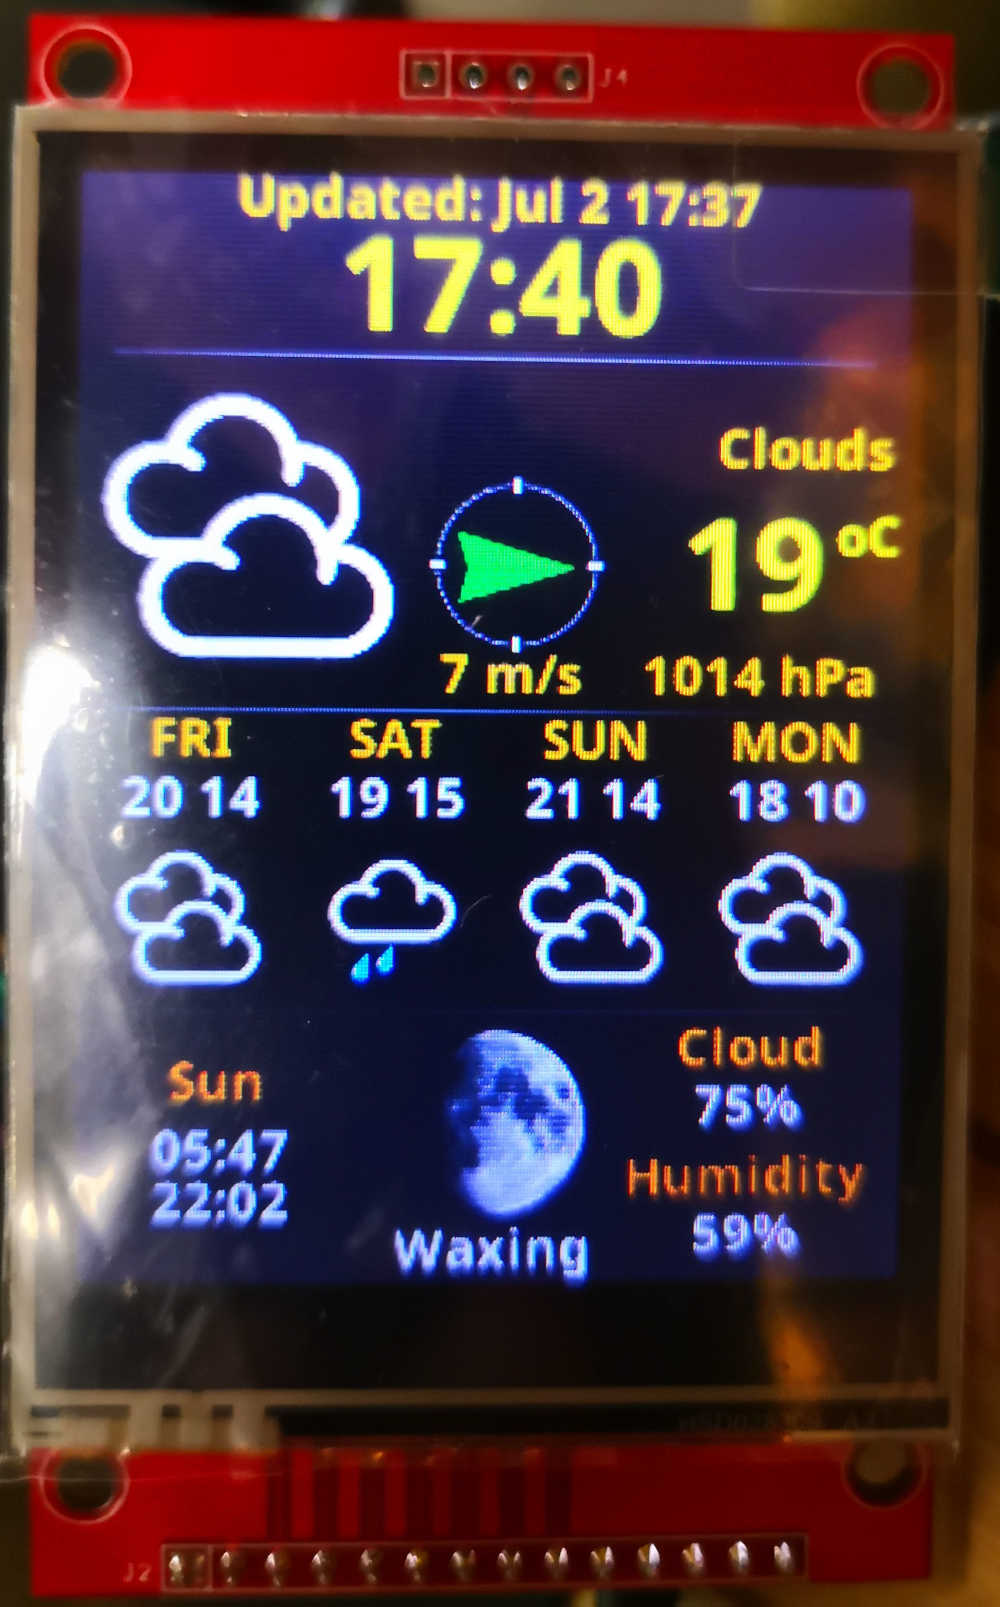
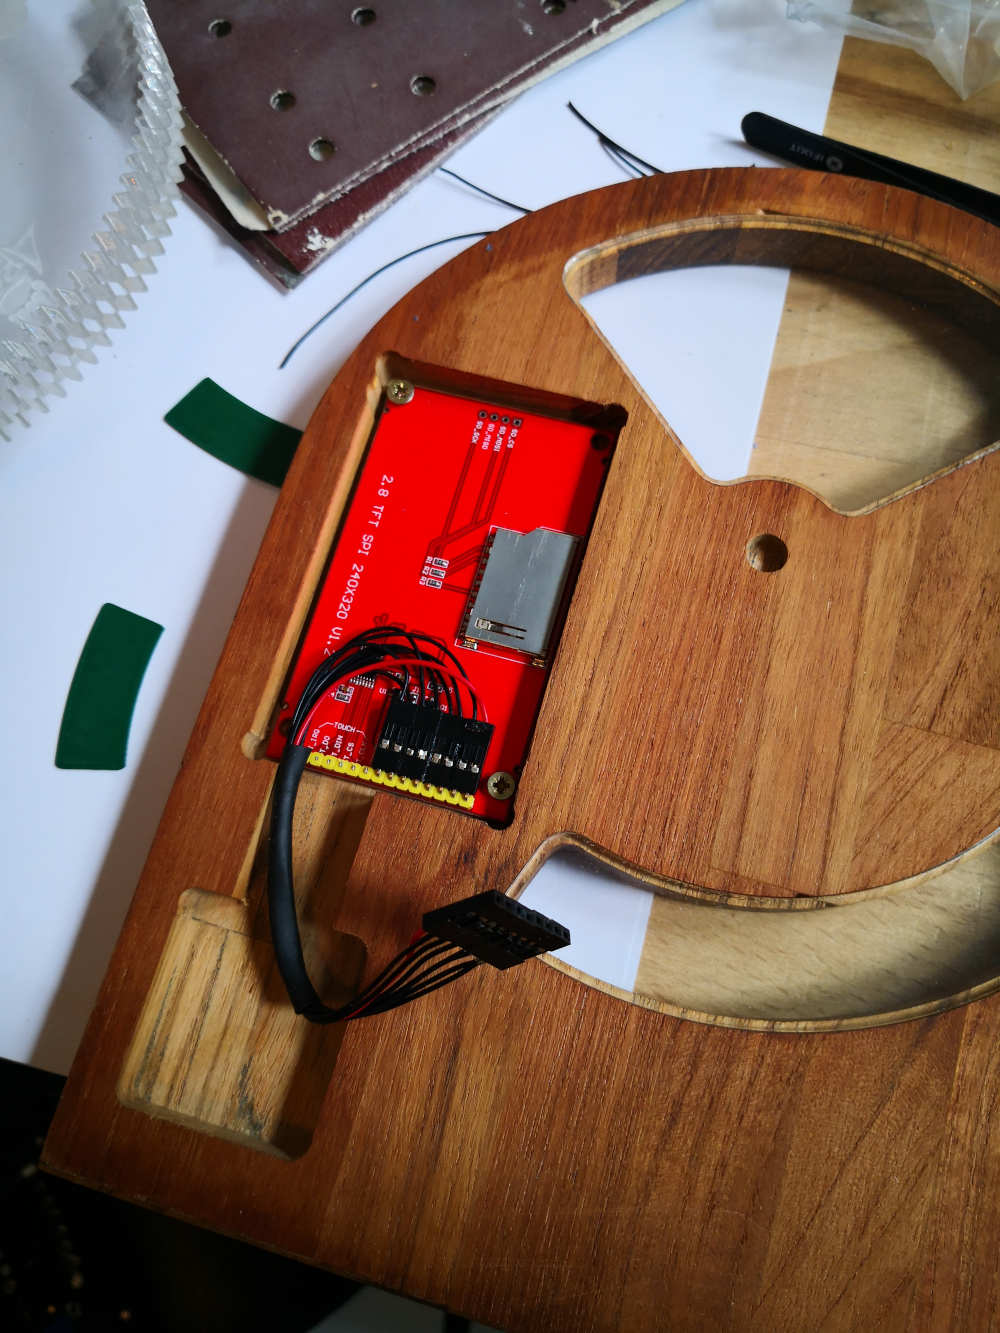
- adding a 8 pins connector for the TFT screen i gomma use.
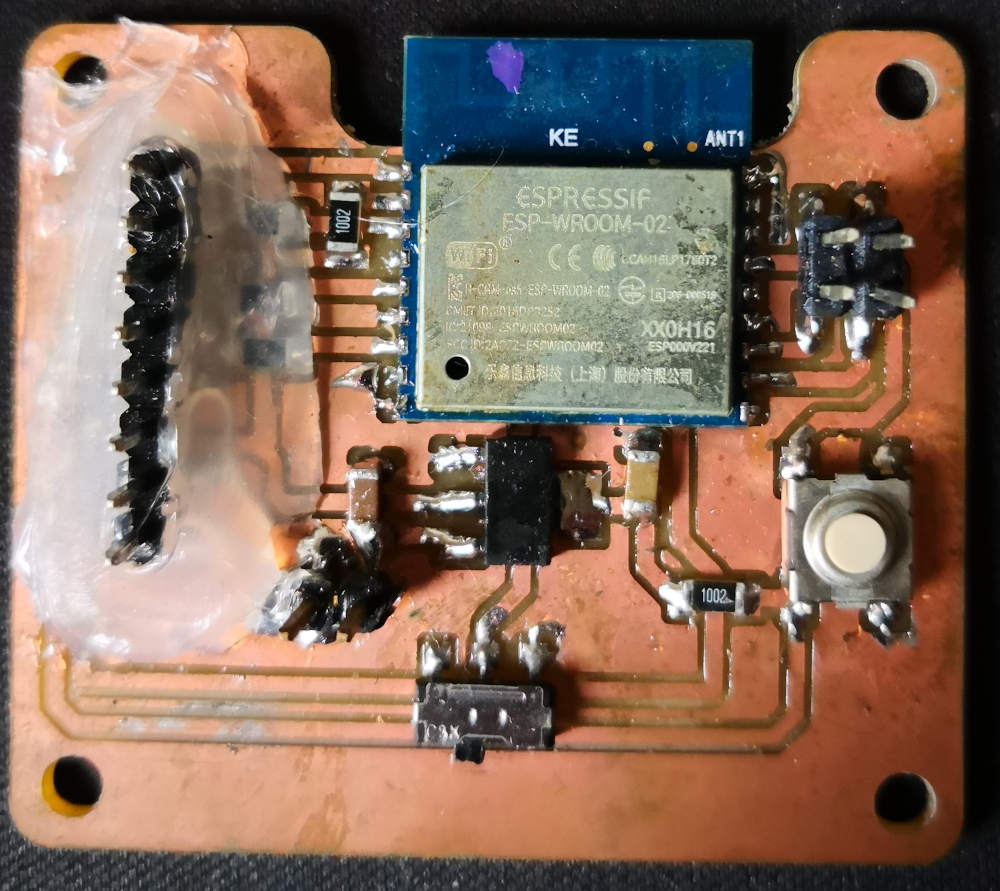
This boards is connected with the 3 actuators boards & send to it a simple character by serial communication to change the gears display as the actual weather informations.
It also drive the tft screen display. For this i use some libraries & a code i modify from Bodmer. My ESP board code is made on the base of the TFT_eSPI_OpenWeather exemple.
I choose to work around this code due to the perfect rendering he have, it give me all the information i want really clearly.
The code files & all the libraries needed to run it Here. The board files Here
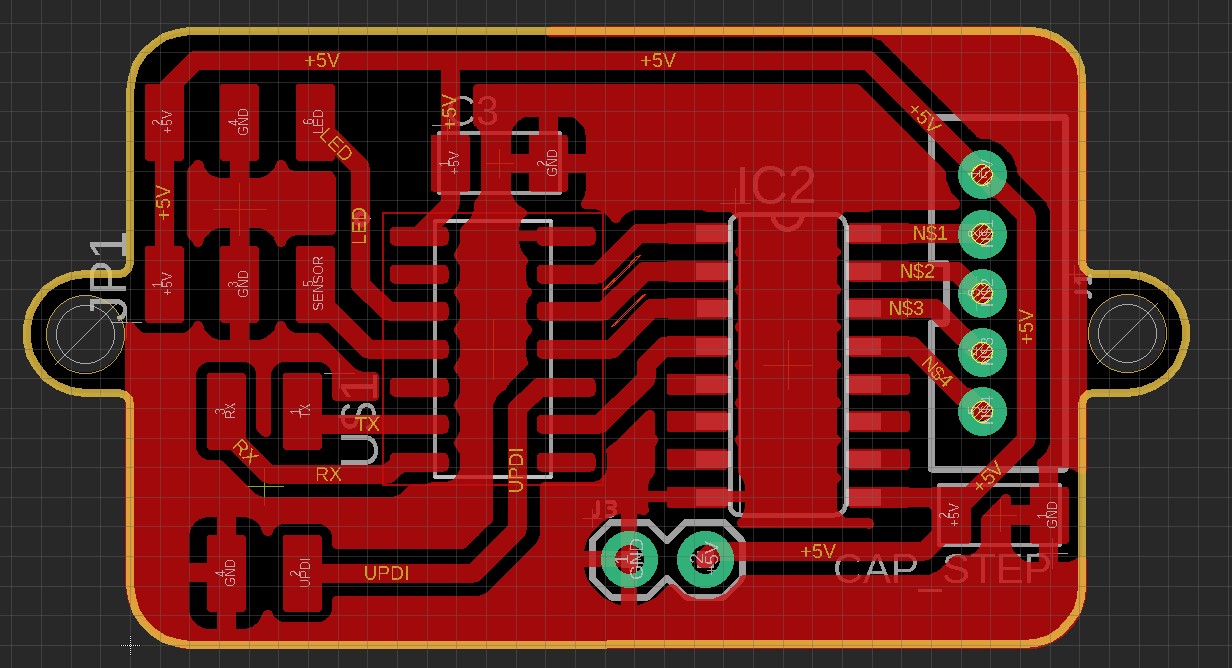
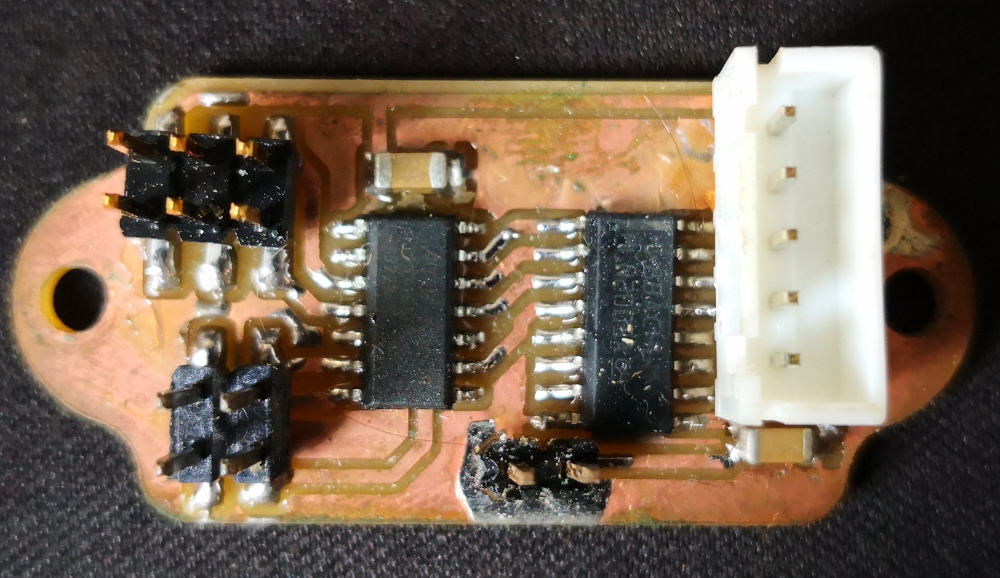
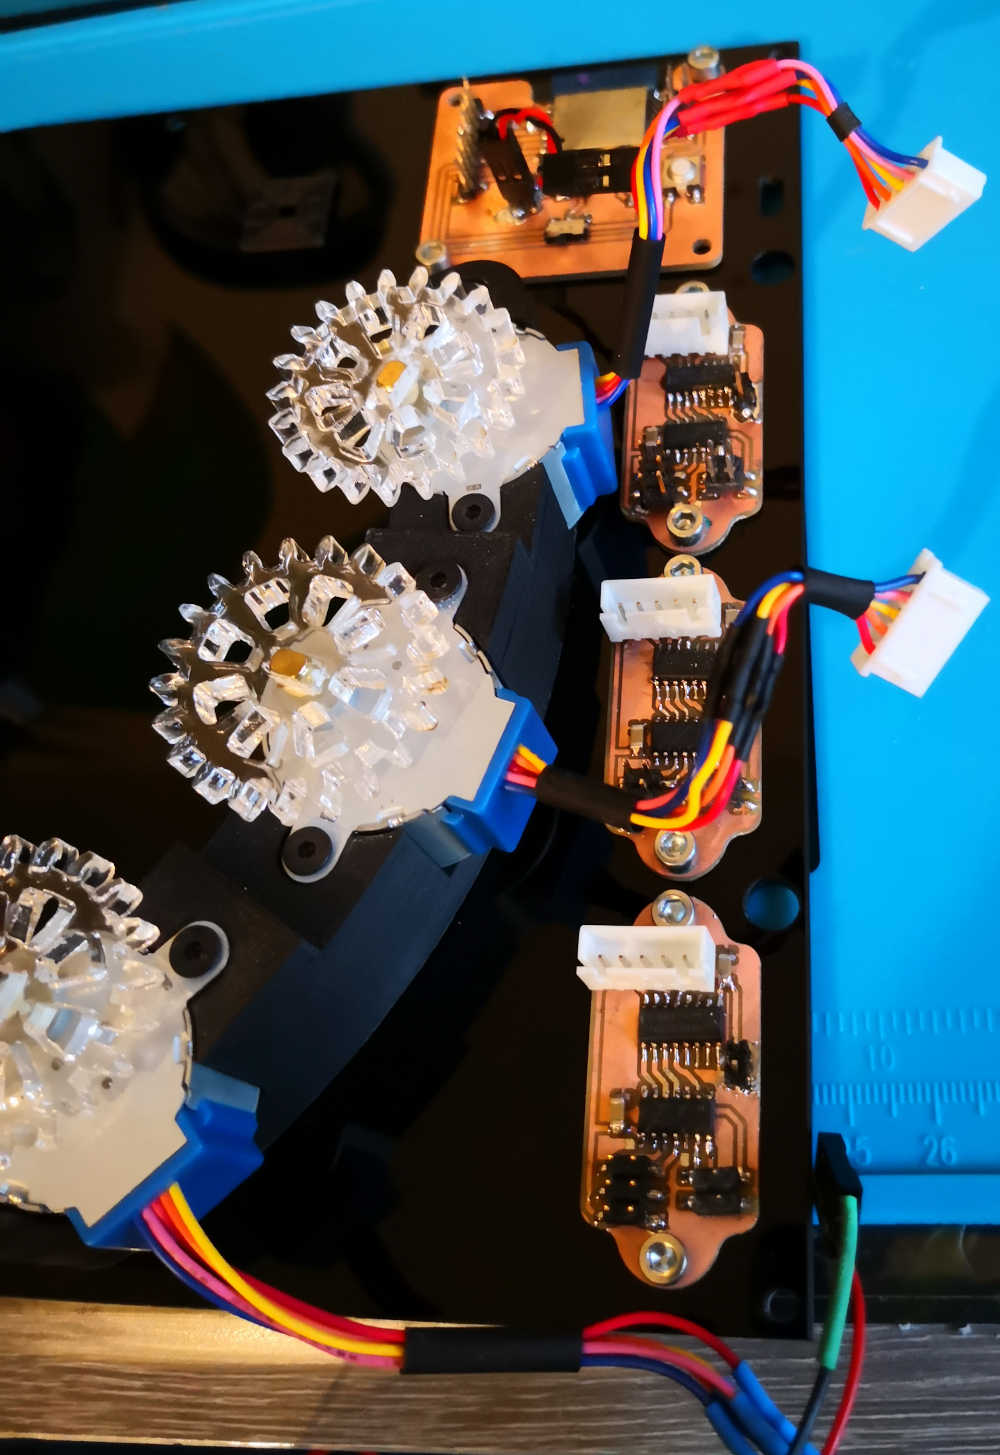
= ATTiny 1614 aka THE ACTUATOR =
On the project this board is replicate 3 times, one for each display gear used. His role is to display the actual weather by moving a
28BYJ-48 stepper.
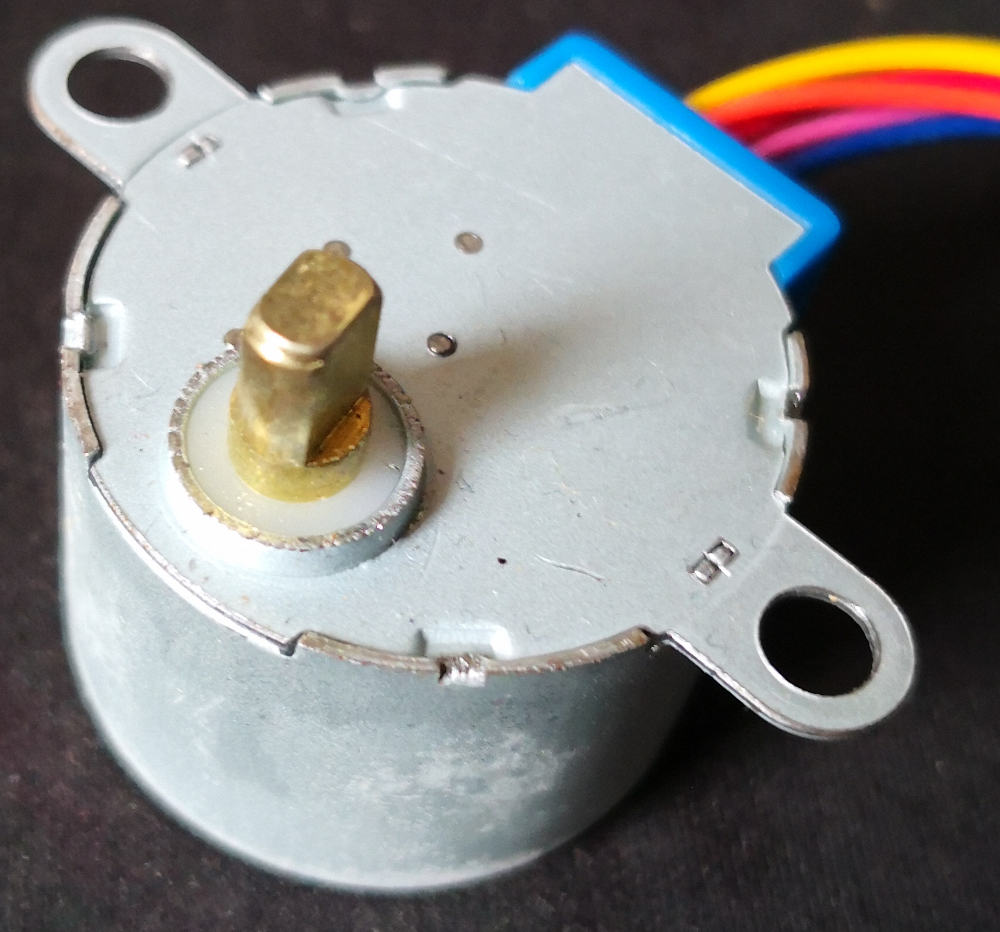
On my first design i want to drive this board with a ATTiny44, but after preparing my code i have to change for a MCU with a larger memory, for this i choose to work with the ATTiny1614.
To drive the Stepper motor i just need a ULN2003 darlington transistor to amplify the stepper control signal.
The code have 3 different version one for each gears, you could find it Here
The files for the boards is Here
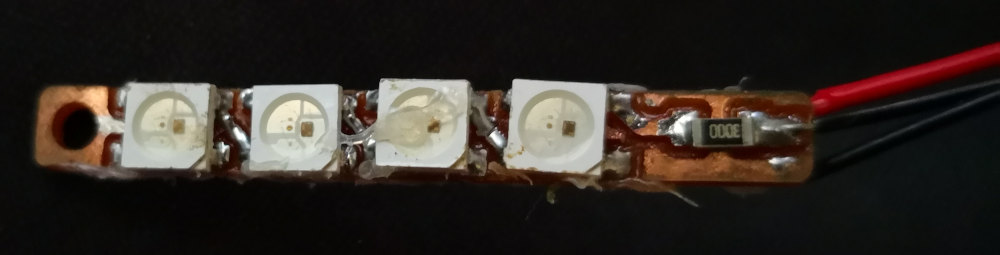
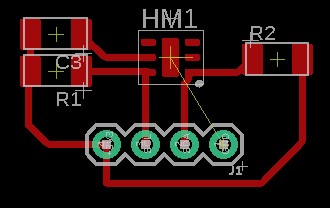
= LED Board =
This board is made to be controlled by the ATTiny one, is simply composed by 4 WS2812B RGB LEDs with some 0.1uF capacitor for stability
I have to made it the smallest posible for integration, the RGB led are 5mm large the boards also have a 5 mm large.


Files for this board Here
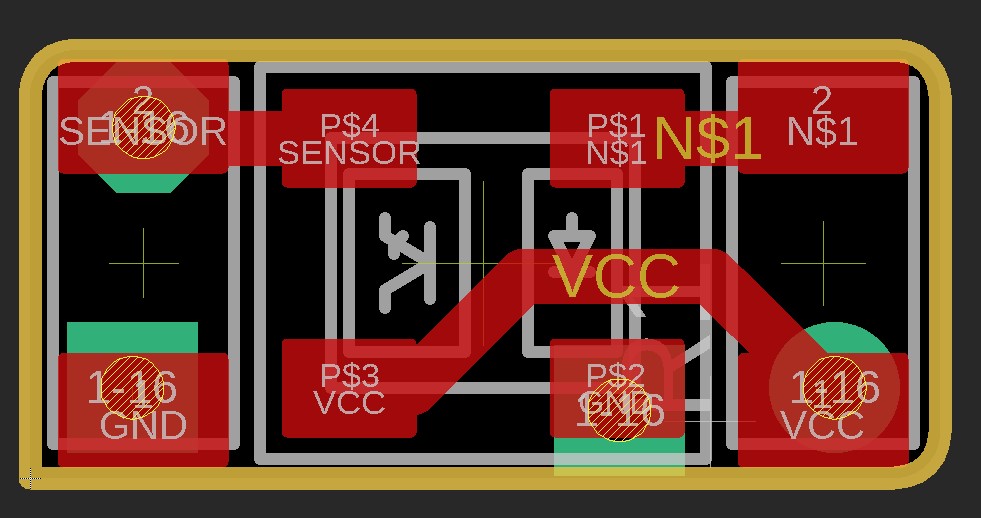
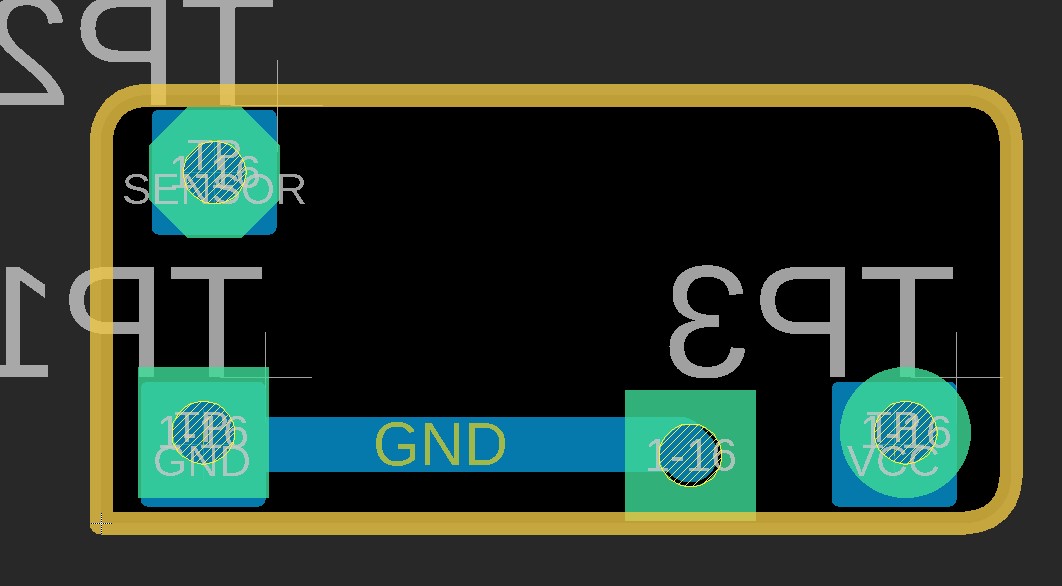
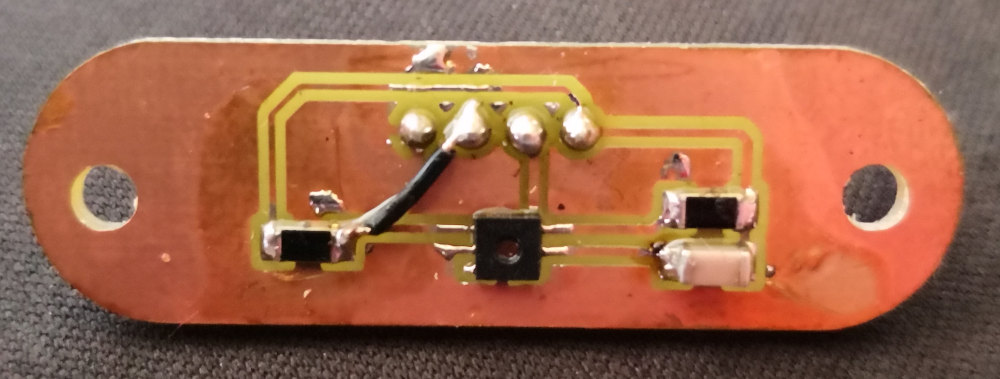
= Sensor Board =
The last board to connect on the ATTiny one is a EE-SY193 reflective photosensor board, this one is here to give to my systeme the capability of homming when i restart the system.
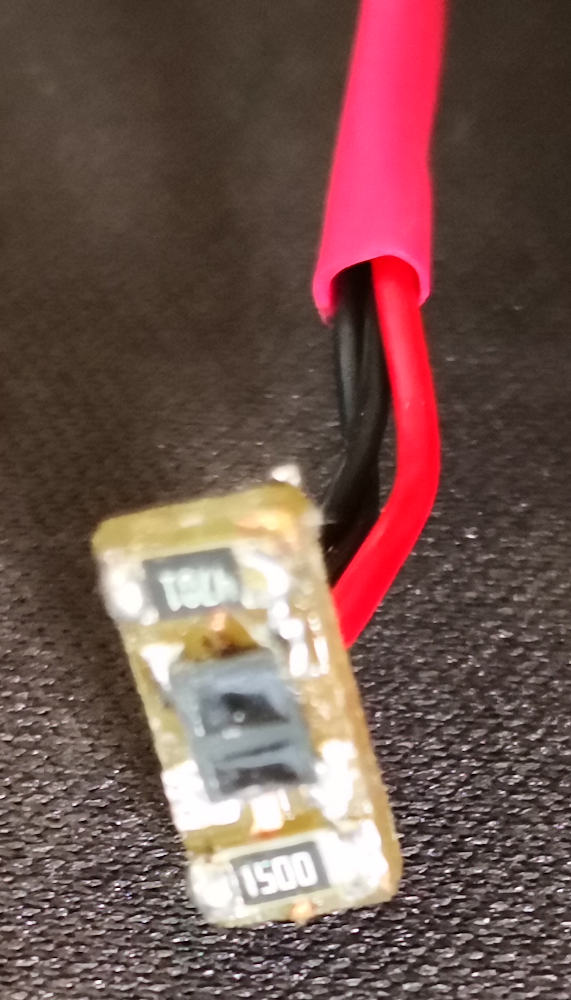
The file for this board Here
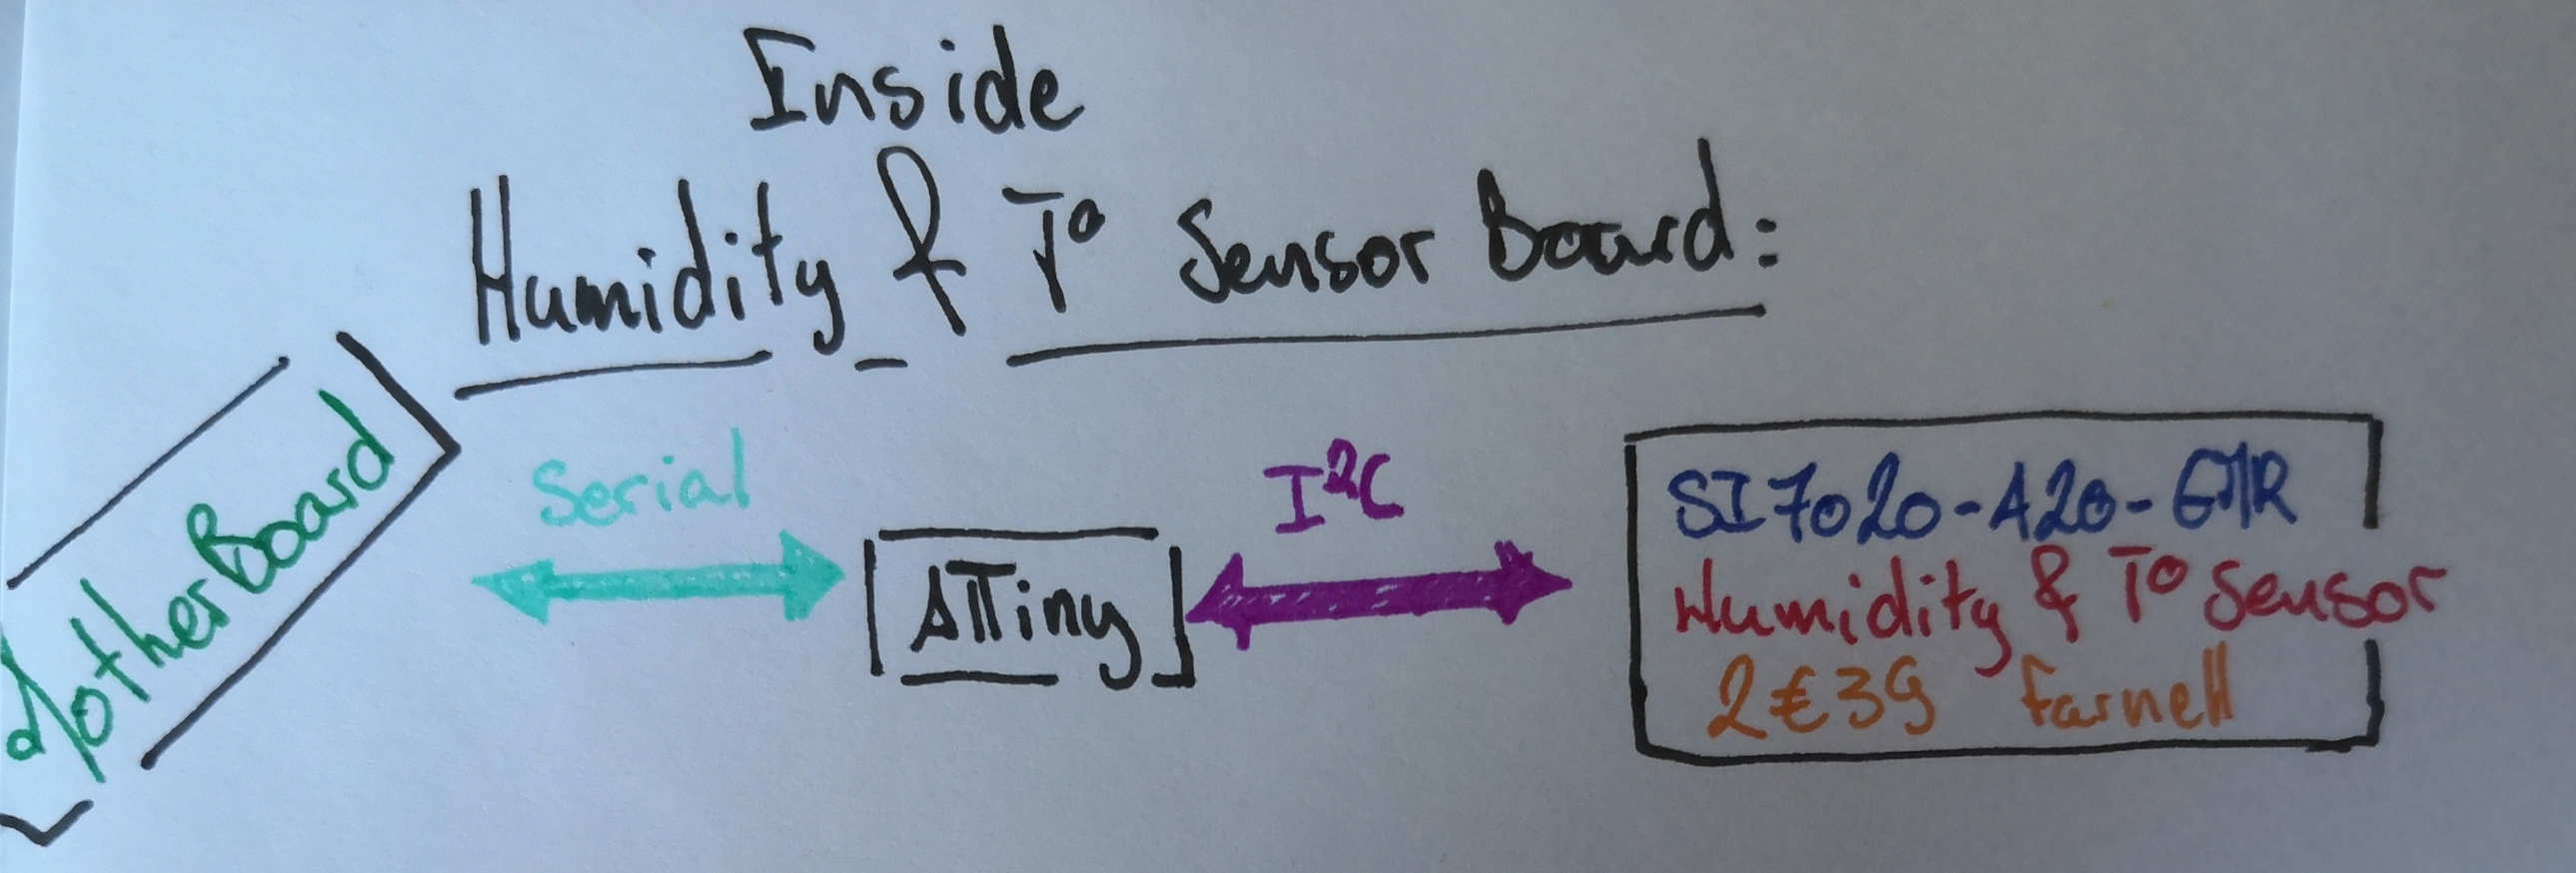
= Temperature & Humidity Board =
On the first plan i want to make a special board with a MCU for the room temperature & humidity sensor, but for a easy work i plan to do it directly connected to the Motherboard, for this i juste make a simple board that handle the Si7020-A20 I2C humidity & temperature Sensor. this sensor was quite triky to solder to the board, is a 3mm by 3mm square with 7 pin under it....
On the prototype i made of it i forgot to rally a pin i just repair it by adding a small jumper on it.
The files for this board is Here
I have probleme with the result it gave to me ( about 3k°C and 800% humidity on a normal room... ), for the moment i put it on the side to be able to finish my project on times and come back on futur to fix it.
♦3D printed Parts:
On my final project i include some piece on 3D print. All of this parts is made with the same filament and the same settings, on a Alfawise U20 printer
Setting:
- layer height: 0.1mm
- Wall width: 1mm
- Top & Bottom thickness: 0.8 mm
- Infill: 20% with a Gyroid pattern
- Nozzle temperature: 220°C
- Bed temperature: 60°C
- Print speed: 60mm/s
- Build adhesion: None
- Support: None
The filamant i use is the Volcano PLA by Formfutura, i love this material giving a really nice mat black result & a nice finish surface.
= Axis support =
I try to make this part by molding & casting & it gave me a nice result but infortunatly i don't have a perfect flat surface and when i do my hole on it is not perfectly perpendiculare. So for gain some times on work i decide to remake it by 3D print
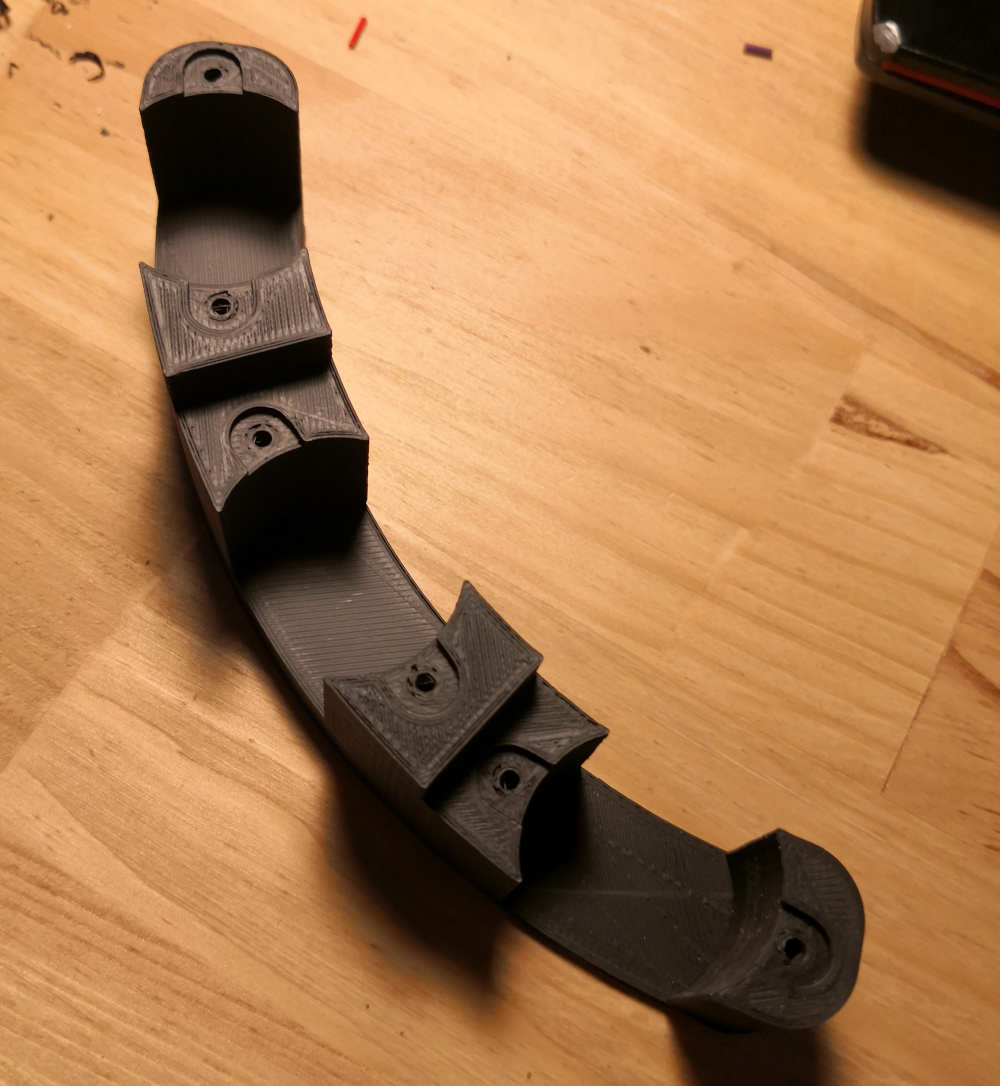
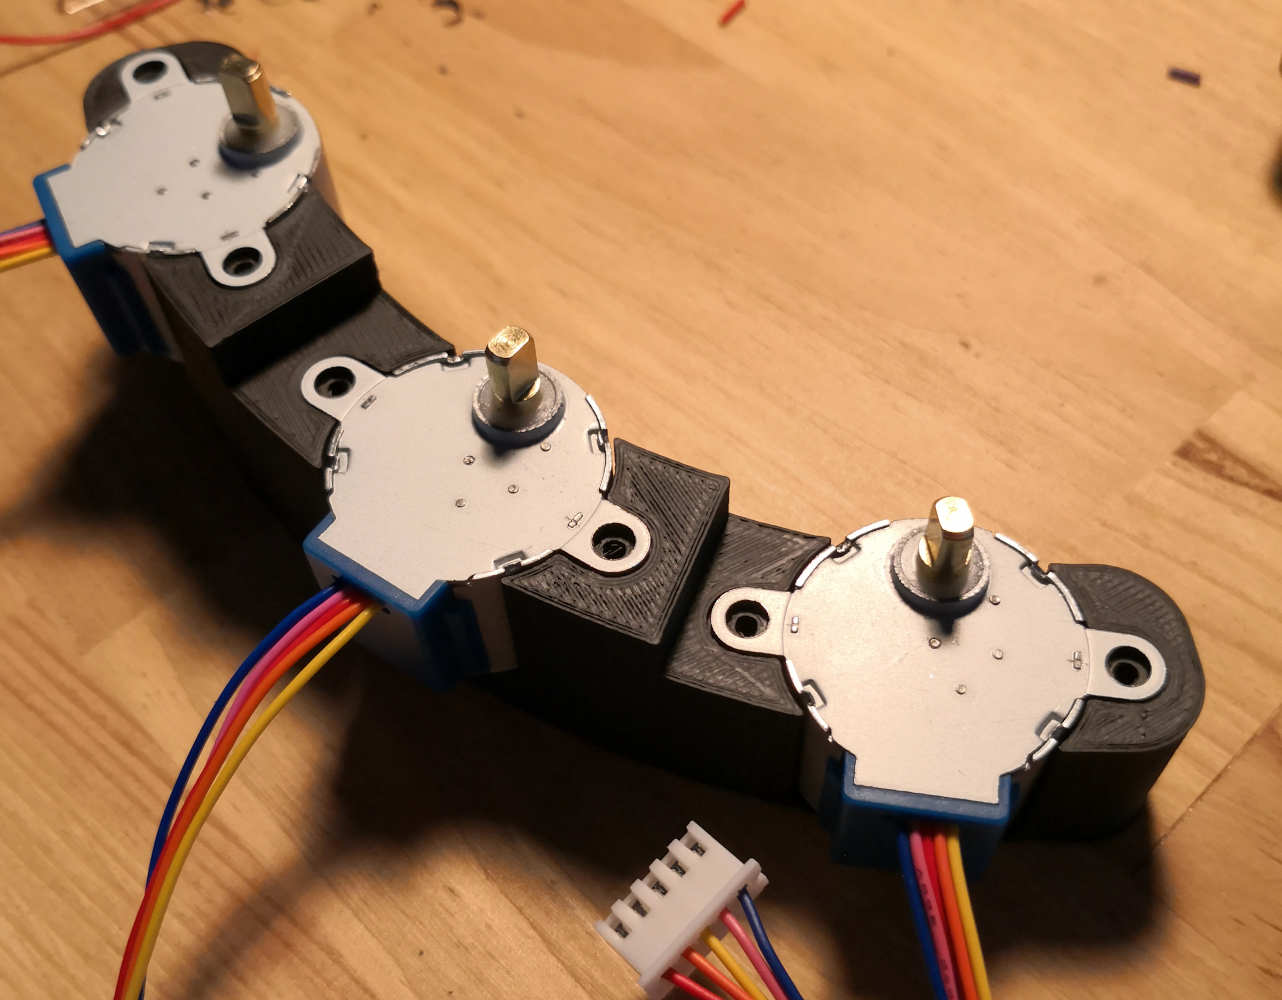
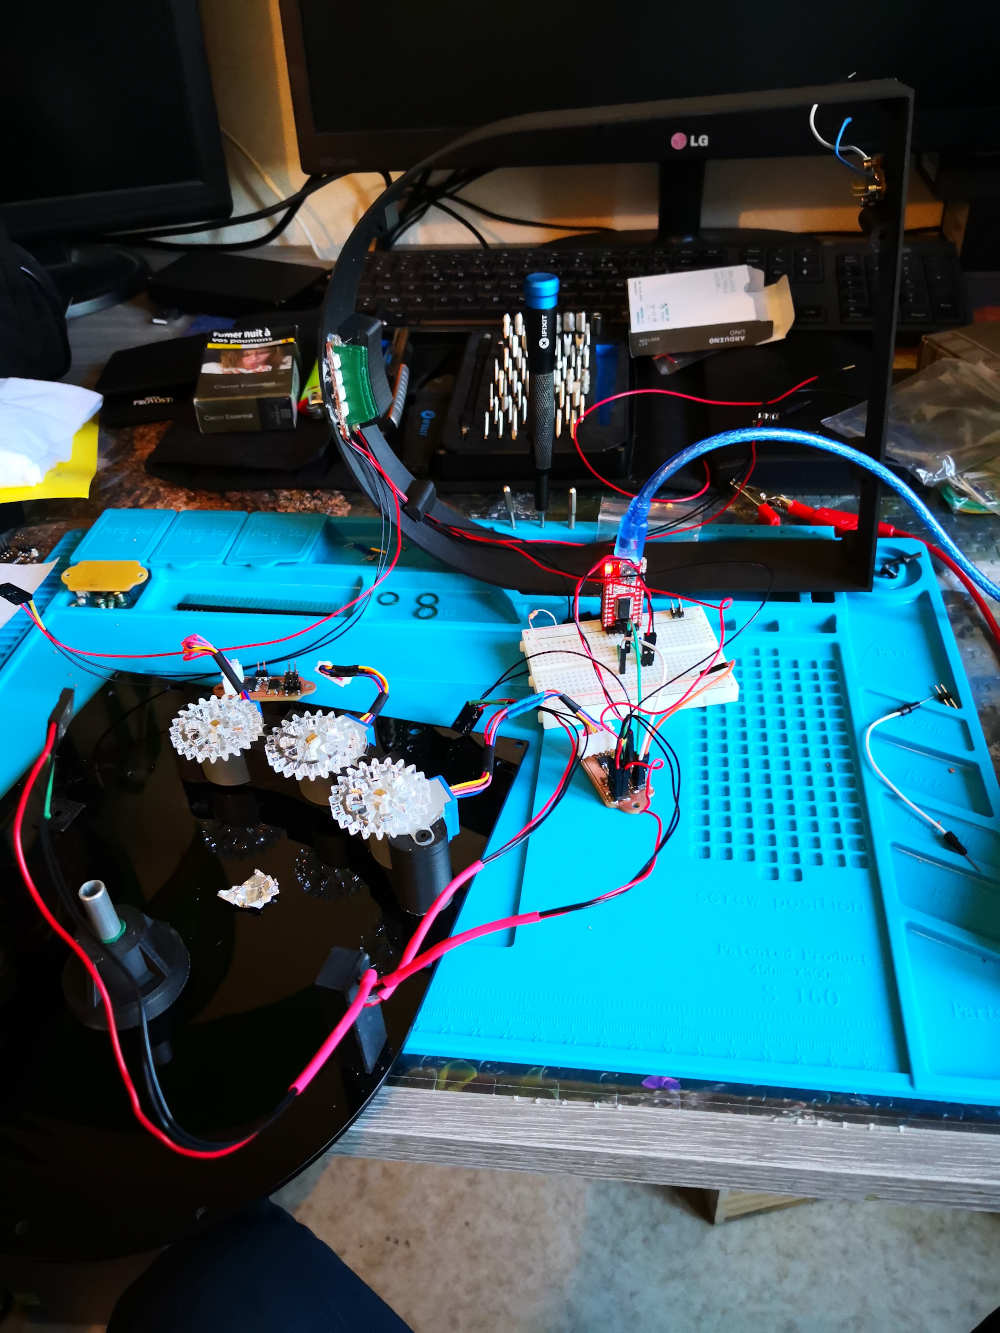
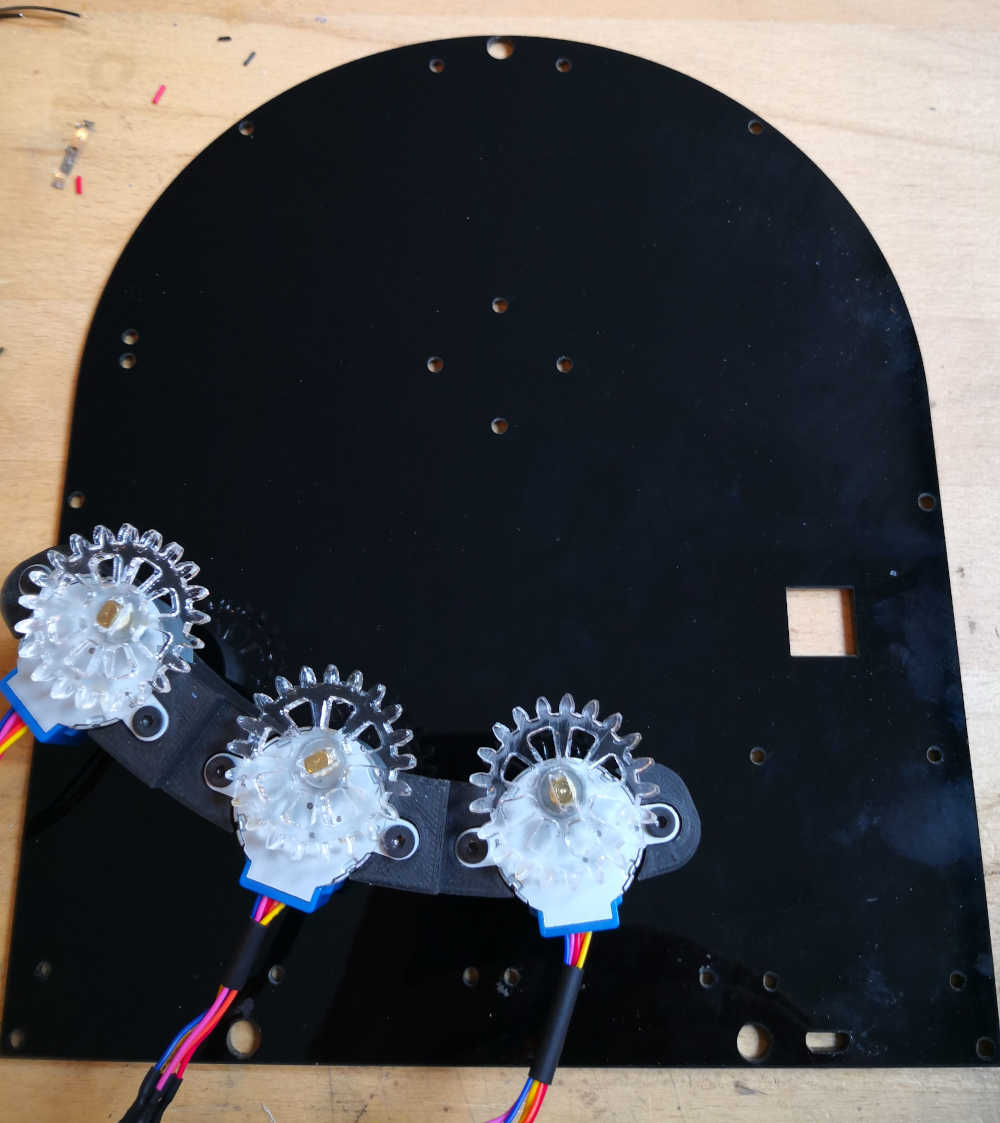
= Stepper support =
This parts is design for place the 3 Stepper in place to faces the gears
= Sensor Holder =
This one is here to align the homming sensor with each of the 3 gears of the project.
= Temperature & humidity sensor window =
I design this piece to have a good measure for external temperature & humidity with the SI7020 Sensor.
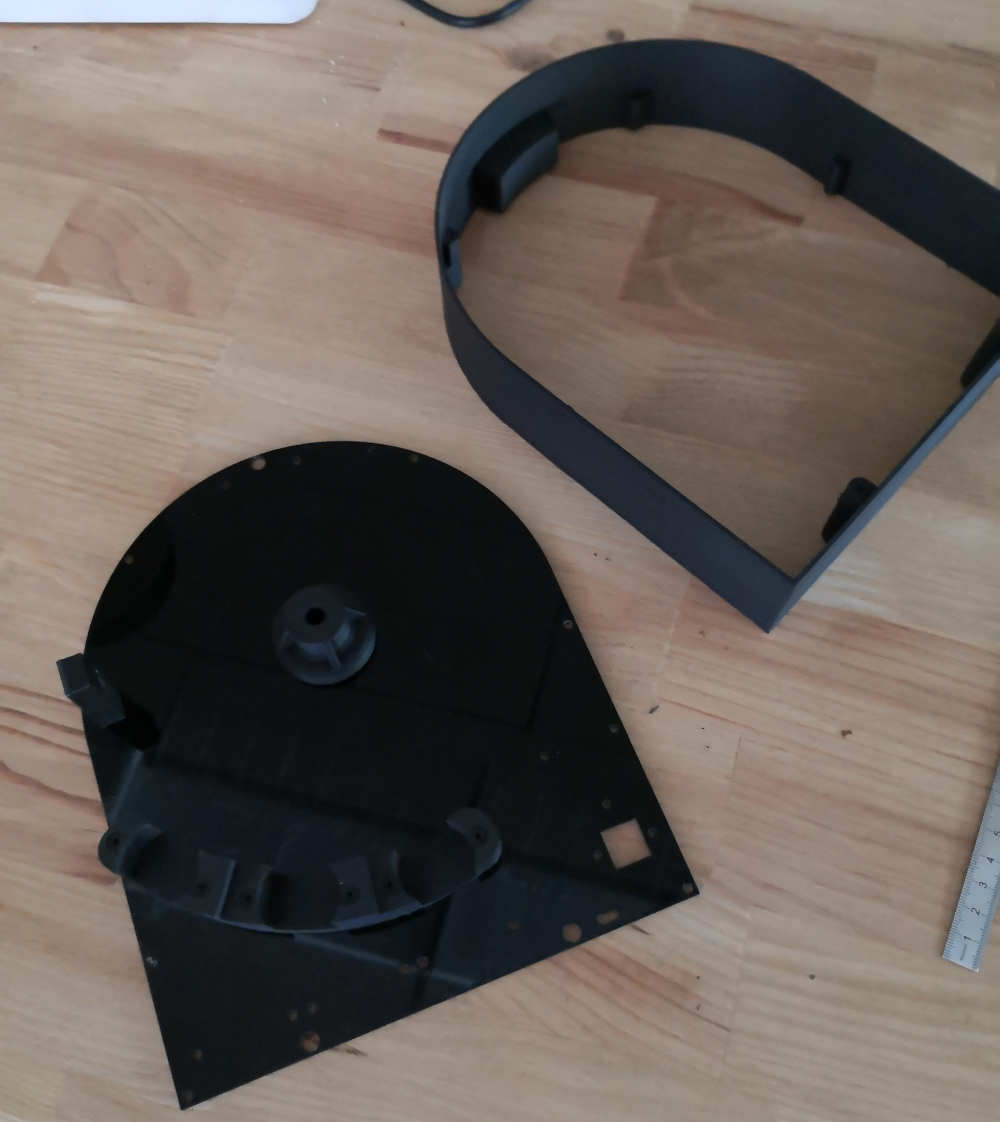
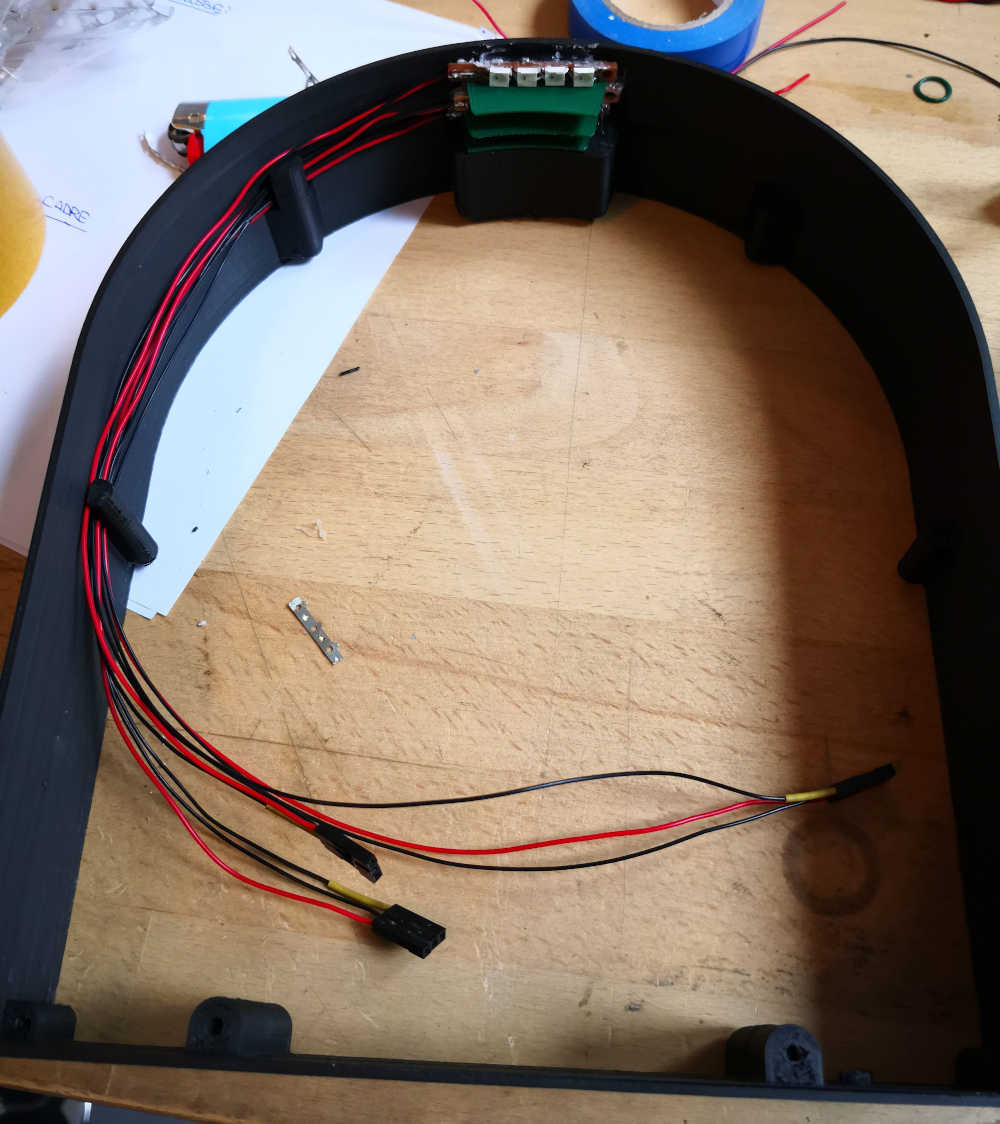
= Project enclosure =
The last printed part is made to handle the wooden face and the PMMA back piece and assure the full enclosure of the project. It also assure the good placement for the LED arrays i made.
♦Laser Cutted Parts:
Some of the most important parts of this project is made by laser cutting let's take a look at this:
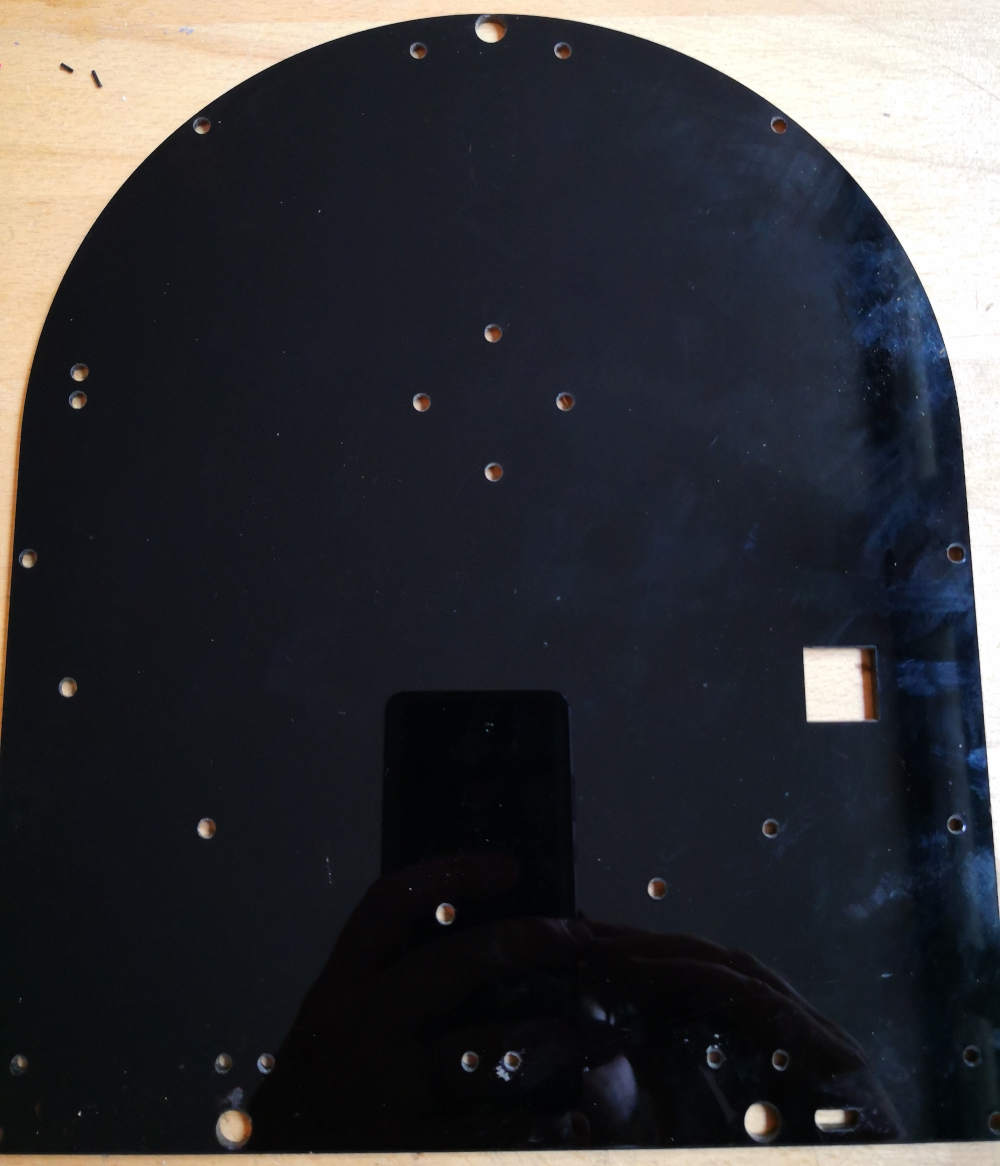
= Back panel =
this piece is one of the most important, it's the base for screw every thing on place. It's cut on a black PMMA
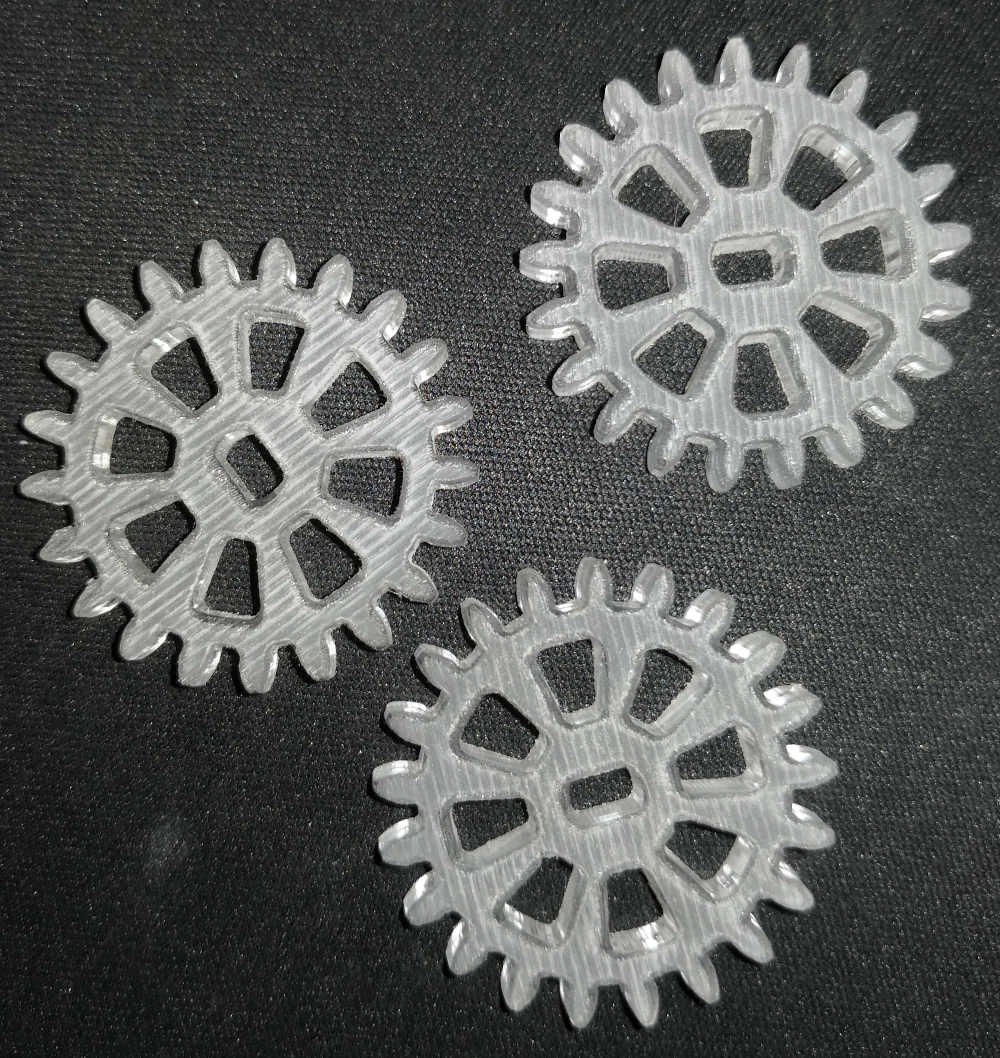
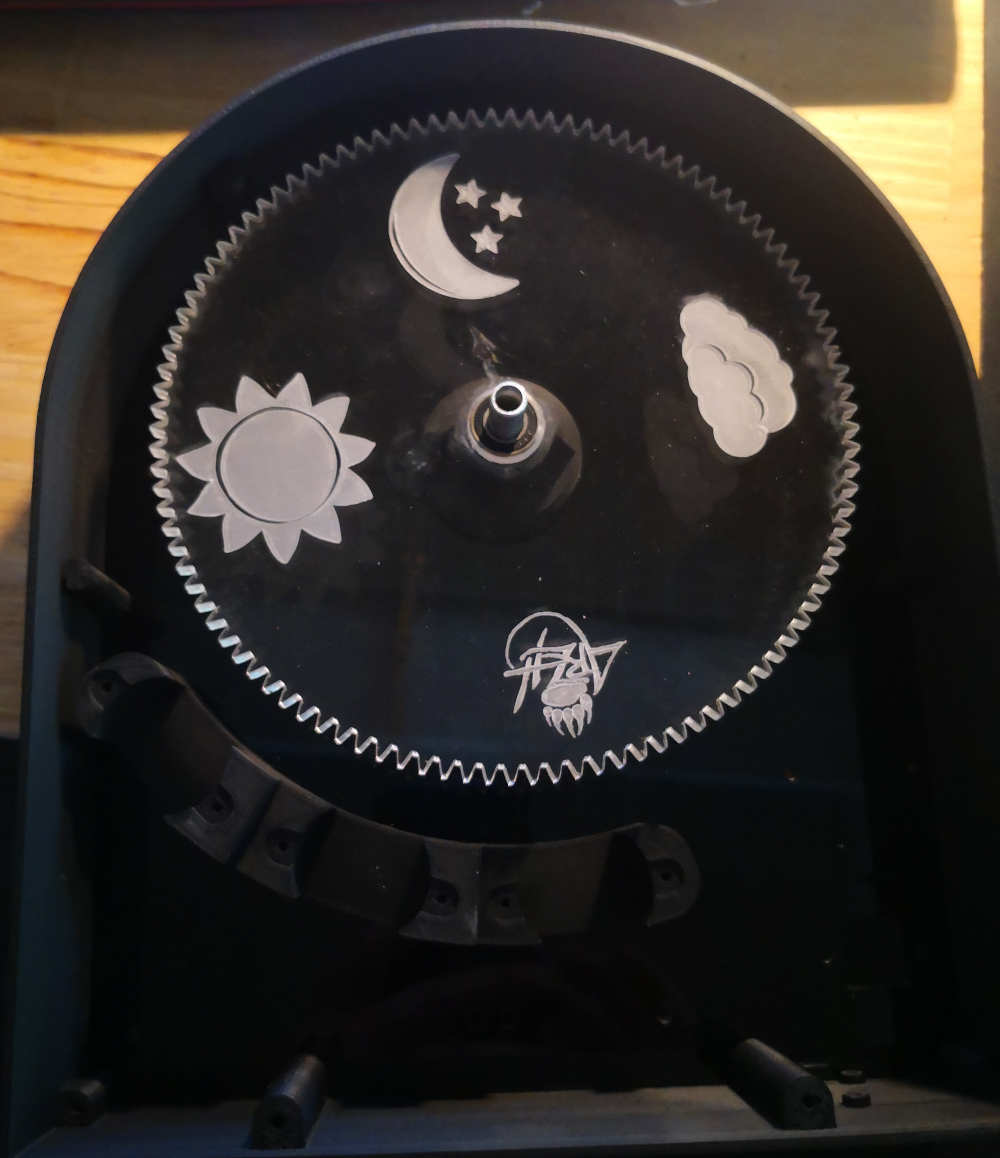
= Gears =
For my mechanical display i cut on a transparent PMMA 2 kind of gears:
- The first kind of gears is the one use for the Lixies effect for this i design large gears where i engrave all the differents weather symbol.
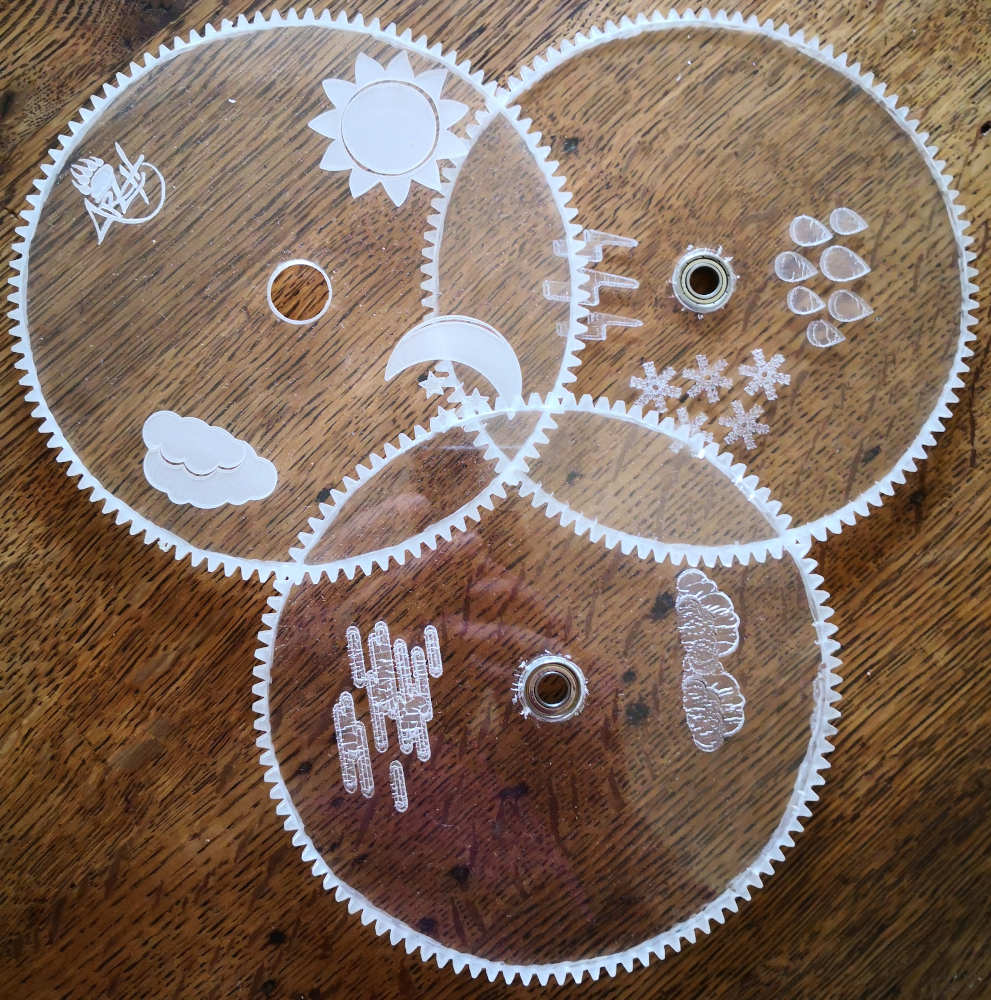
- The second kind is to drive the dispaly gears with the stepper motors.
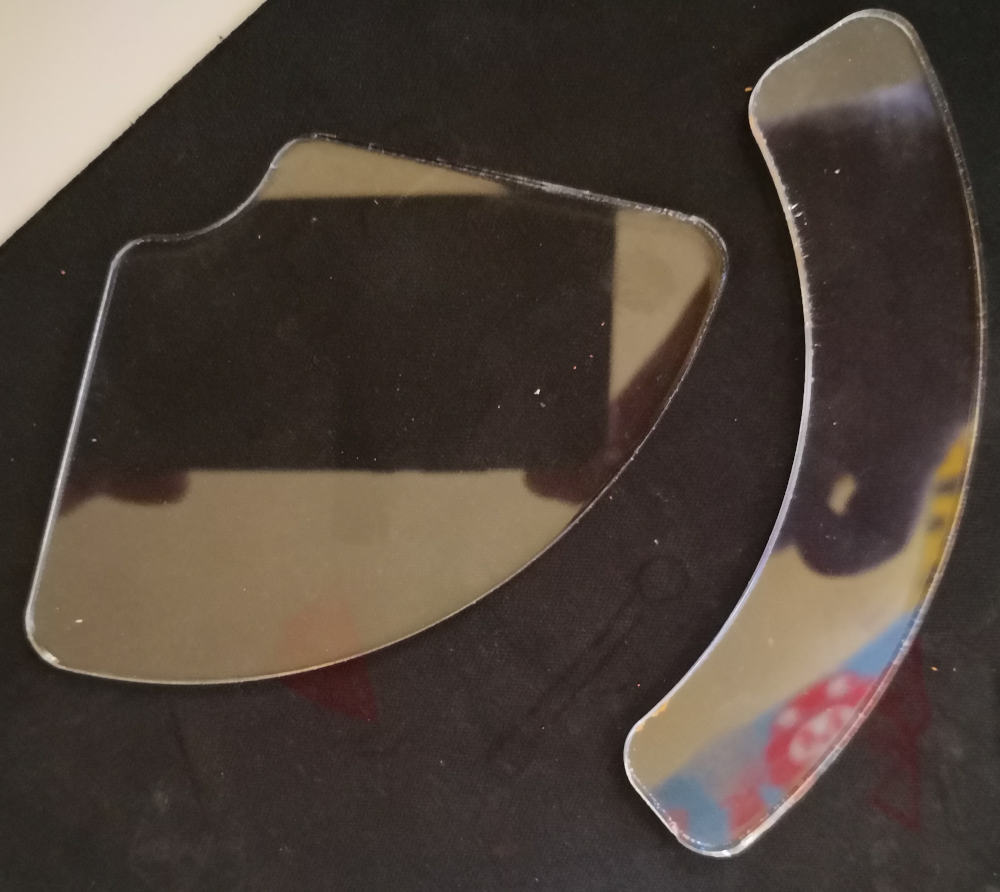
= Screen =
On a clear 3mm thick PMMA i also cut two piece to make a protective screen on the face
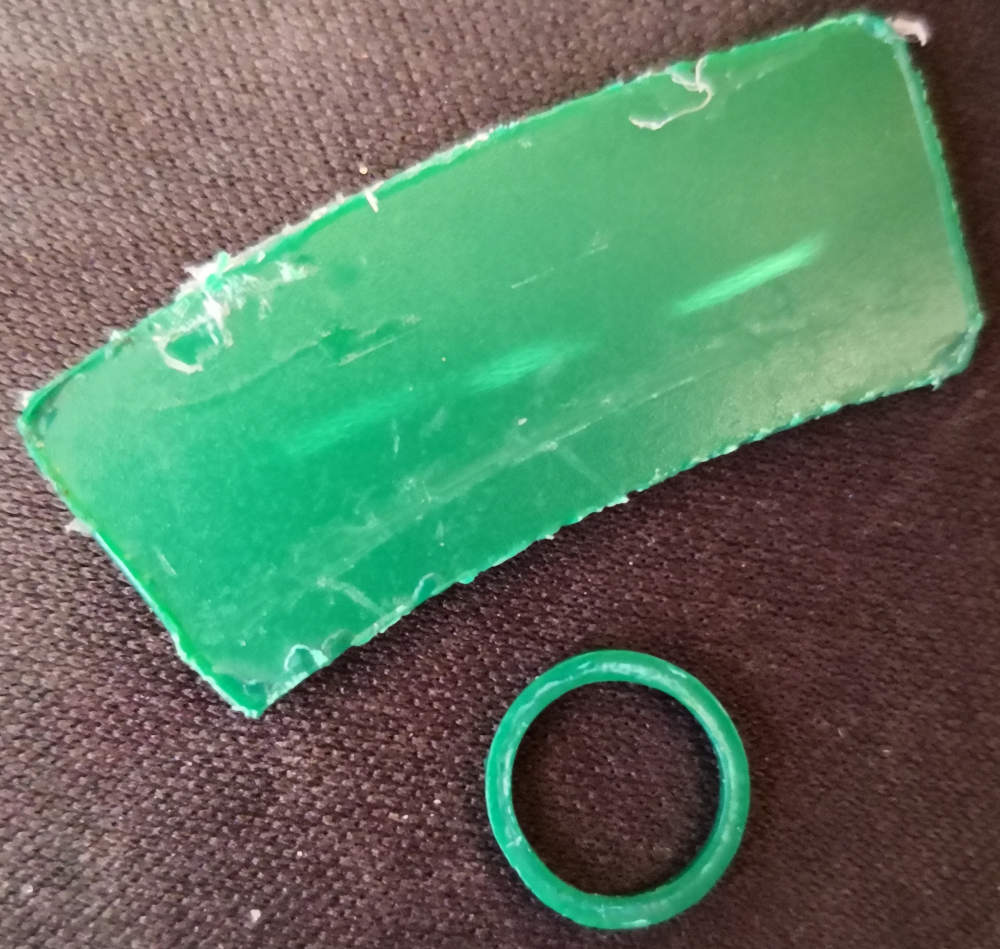
= little pieces =
The last pieces i cut on laser for my project is some interlayer for space a litle the display gears and for keep the LED light on each disk.
This bundle of parts is made on a 0.5mm PETG sheet.
♦CNC machined Parts:
The last part of my project i have to make is the front panel
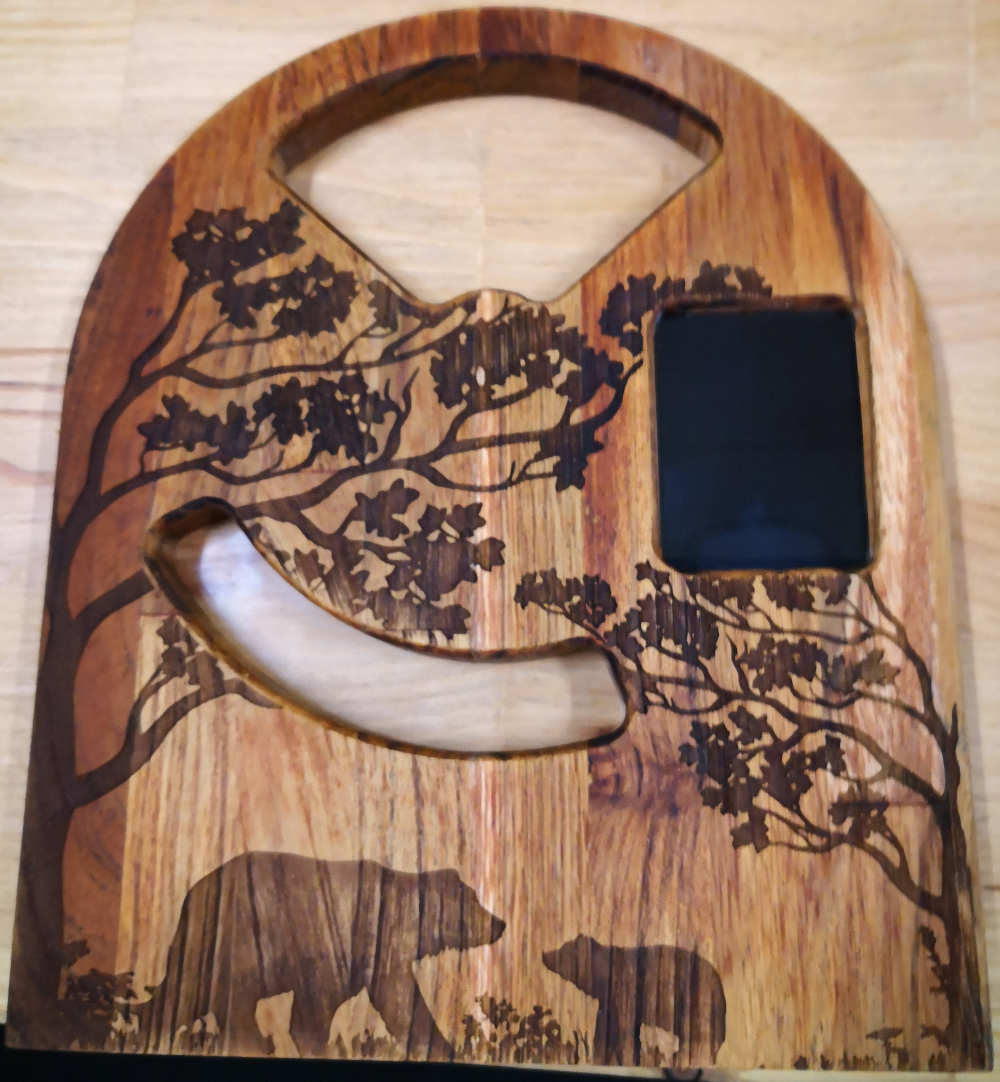
= Front panel =
This panel is made on teak wood and machined on the shopbot ( you could see more about workflow on the shopbot on Week 7 )
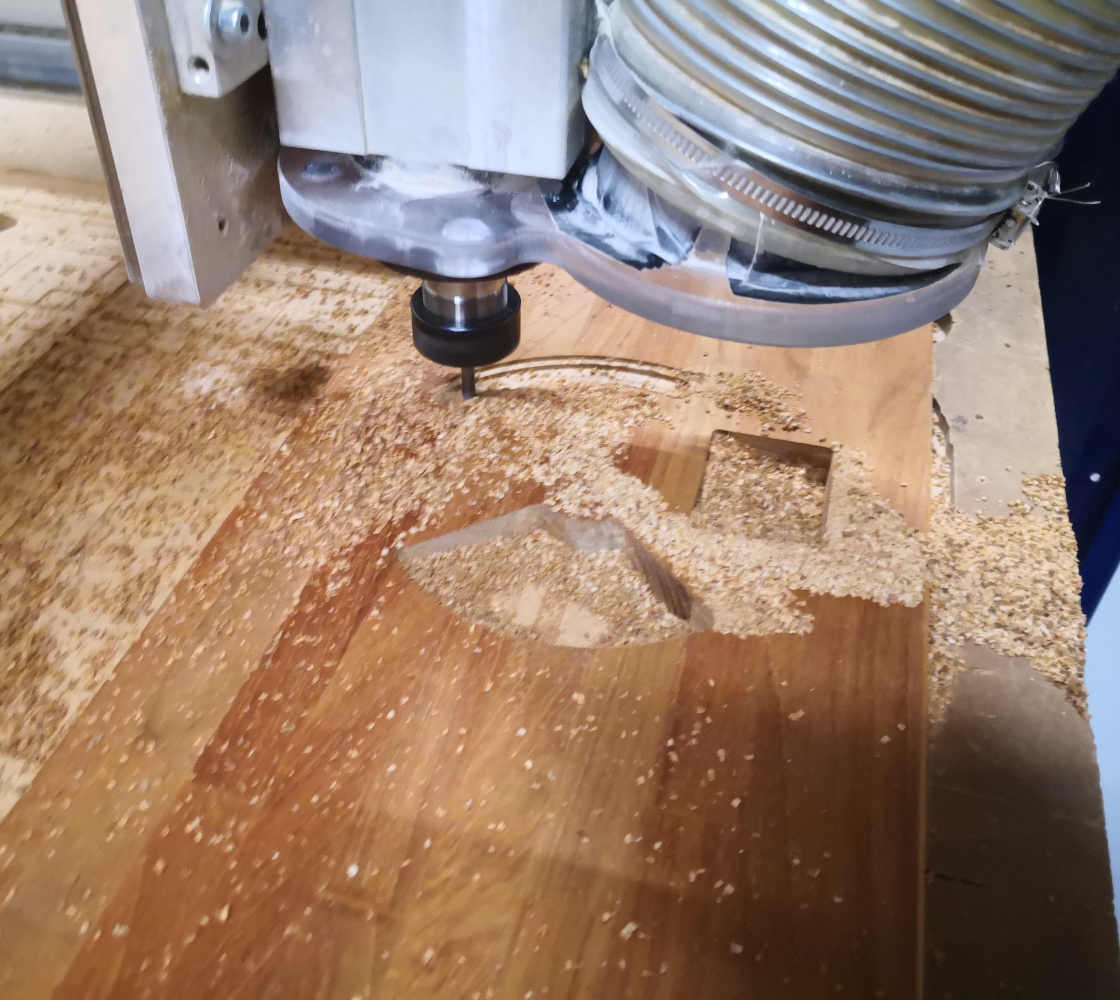
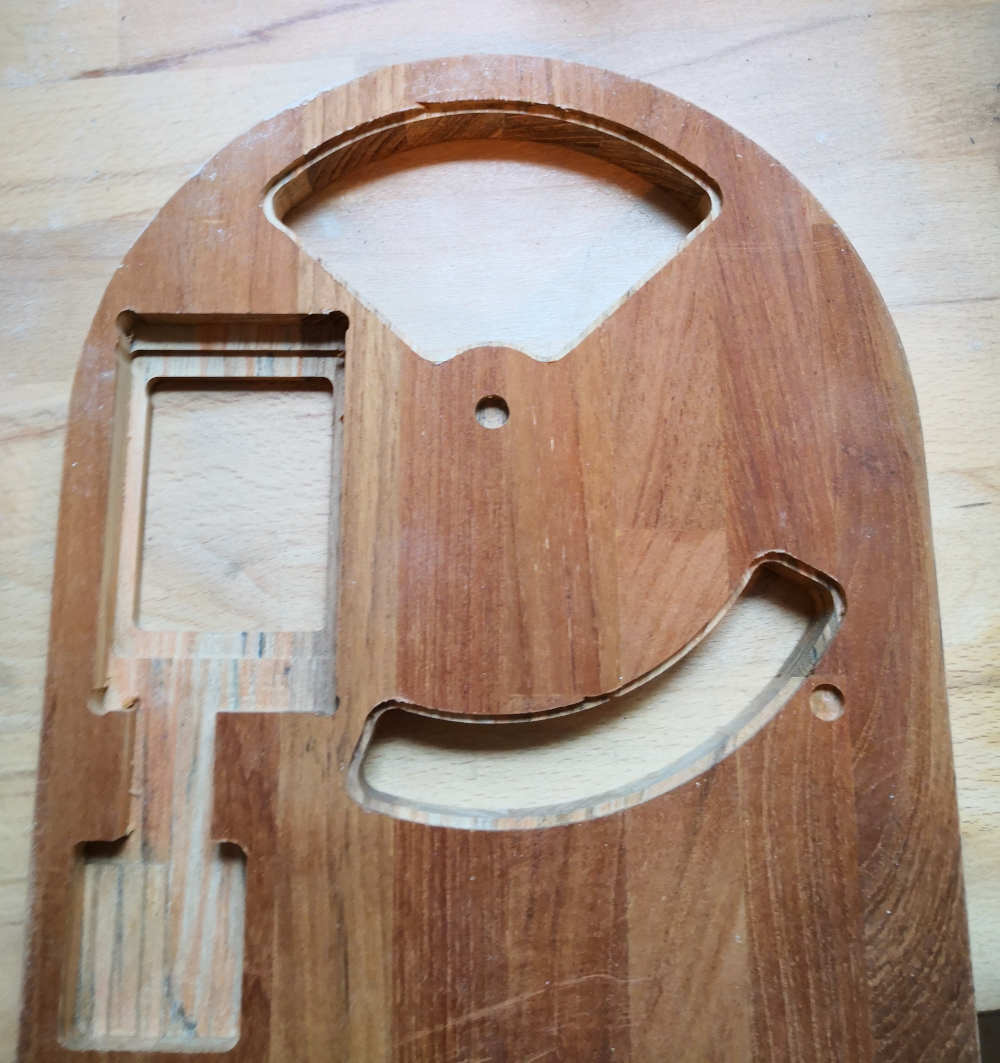
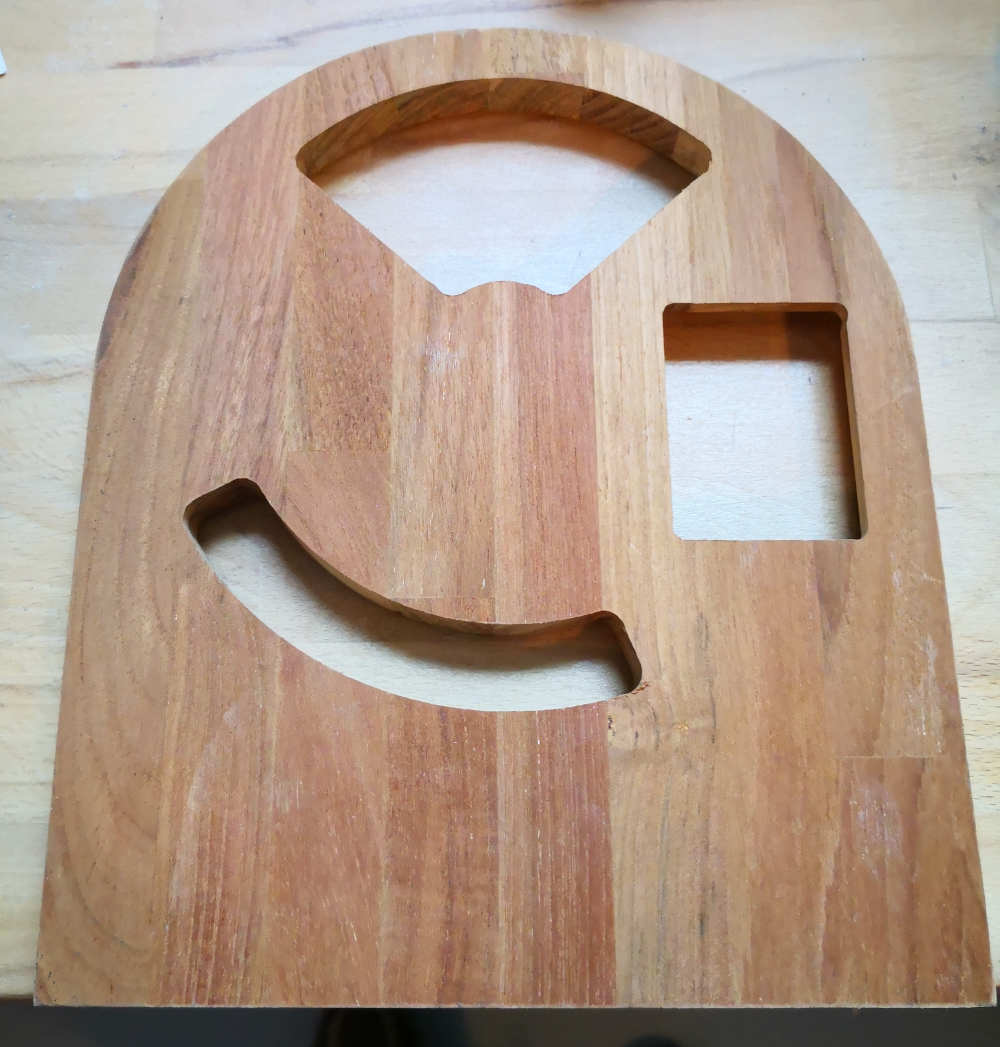
I do some post processing on the faces by ronding all the angles & engraved it. ( for have the good placing on the lasercutter for engrave my wood i start by cut the outline of my woodparts on a fixed cardboard. )
Finish by passing some linen oils on the wood for a better result
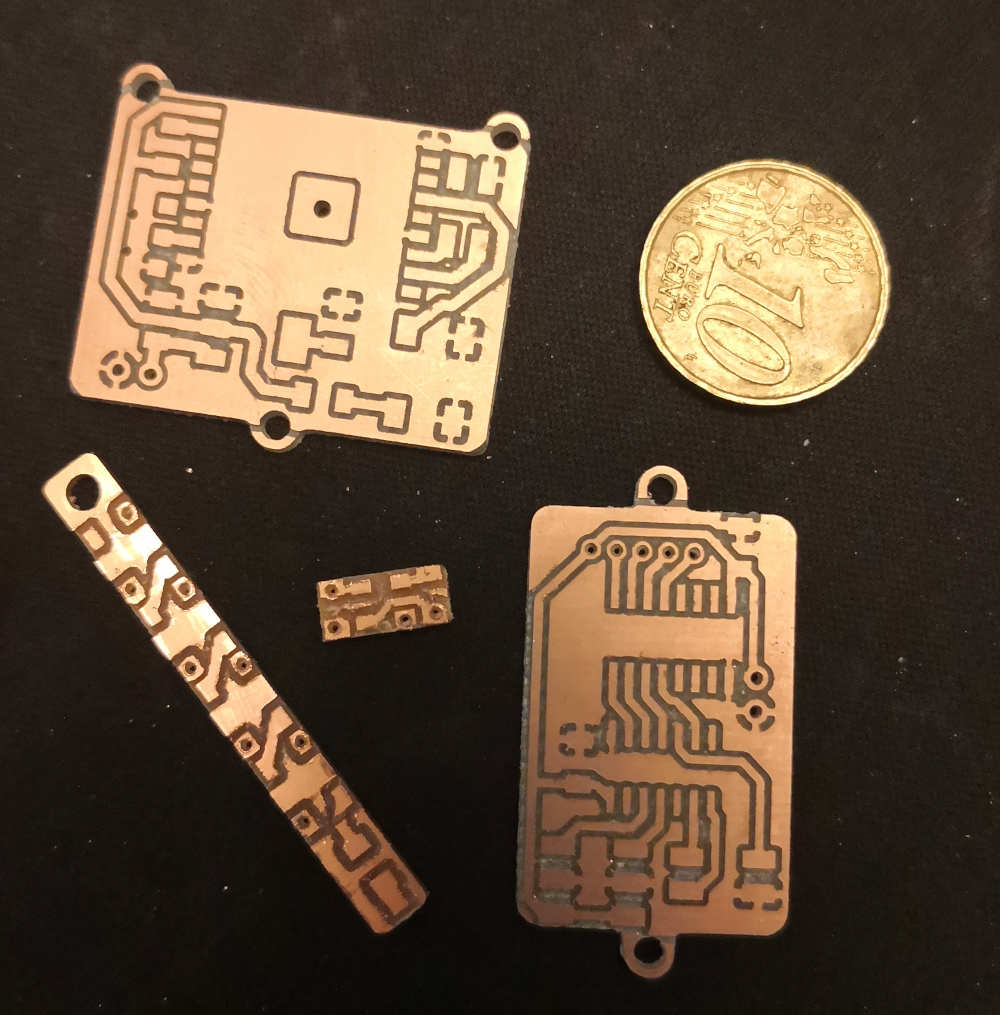
♦Development, Prototyping, Test & Debuging
When the first batch of piece is finish i start by making some test for controll my code and see if everything is right or not. to this i use some breadboard and a lot of jumper.
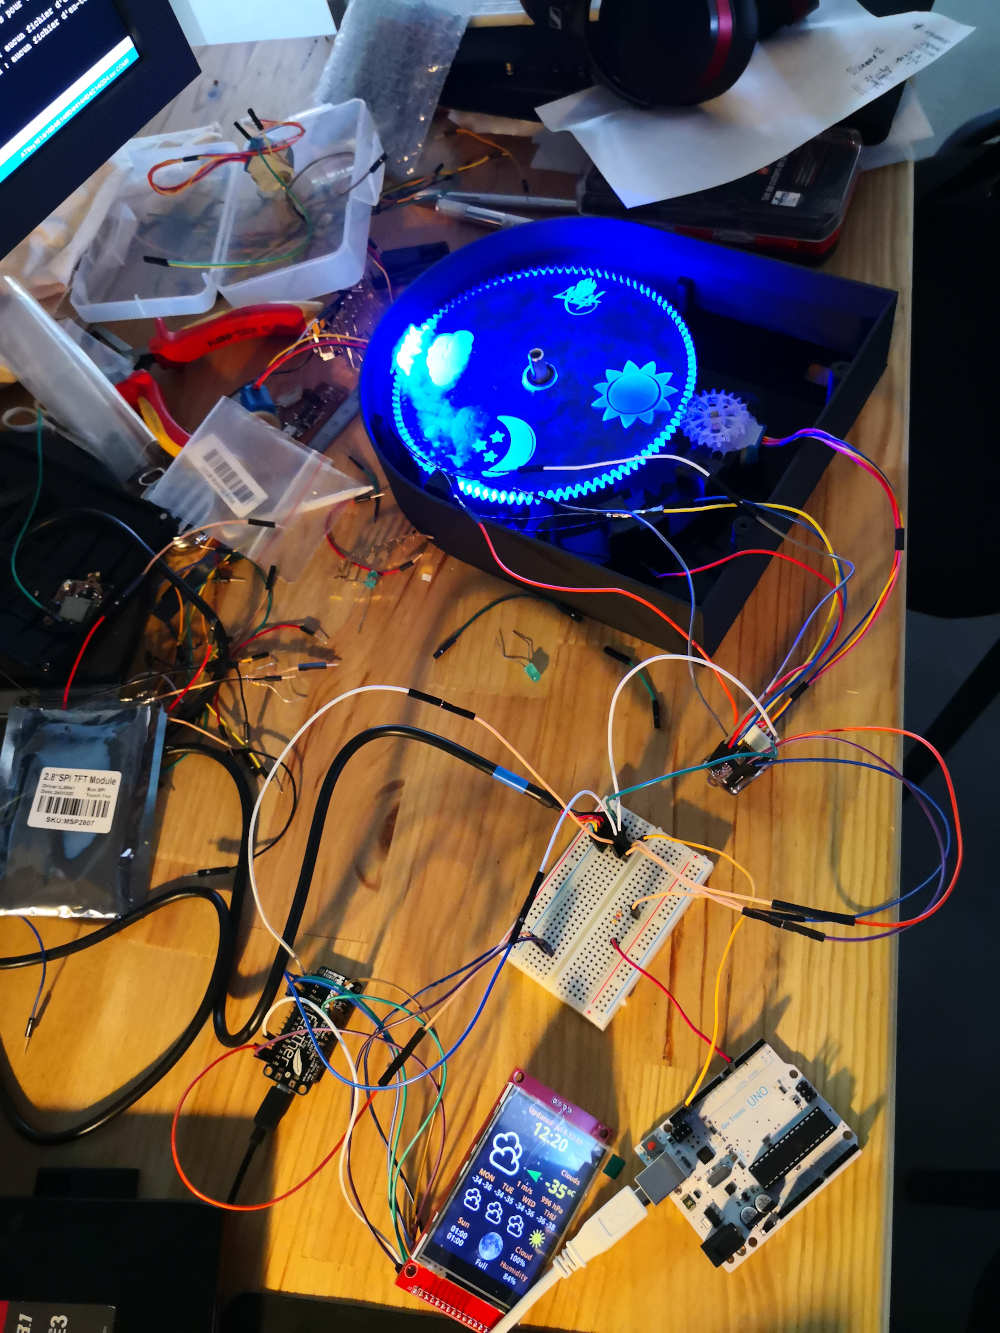
Durring this debugging moments i start to have some headhaches with the communication between the ESP board & the ATTiny one, testing each one separatly show no problem on the serial communication, but if i try to make it communicate together i cant have a good result.
Finaly i find the problem:
The adafruit neopixel libraries is not compatible with the 20MHz clock of the ATTiny1614. I change for the tinyNeoPixel libraries include on the Spence & konde Megat=Tiny cOre
On side of this test and debigging phase i finish to produce all my parts and start the final assembly.
♦Assembly & Integration:
On the following photo you could see all the process of assembly step by step:

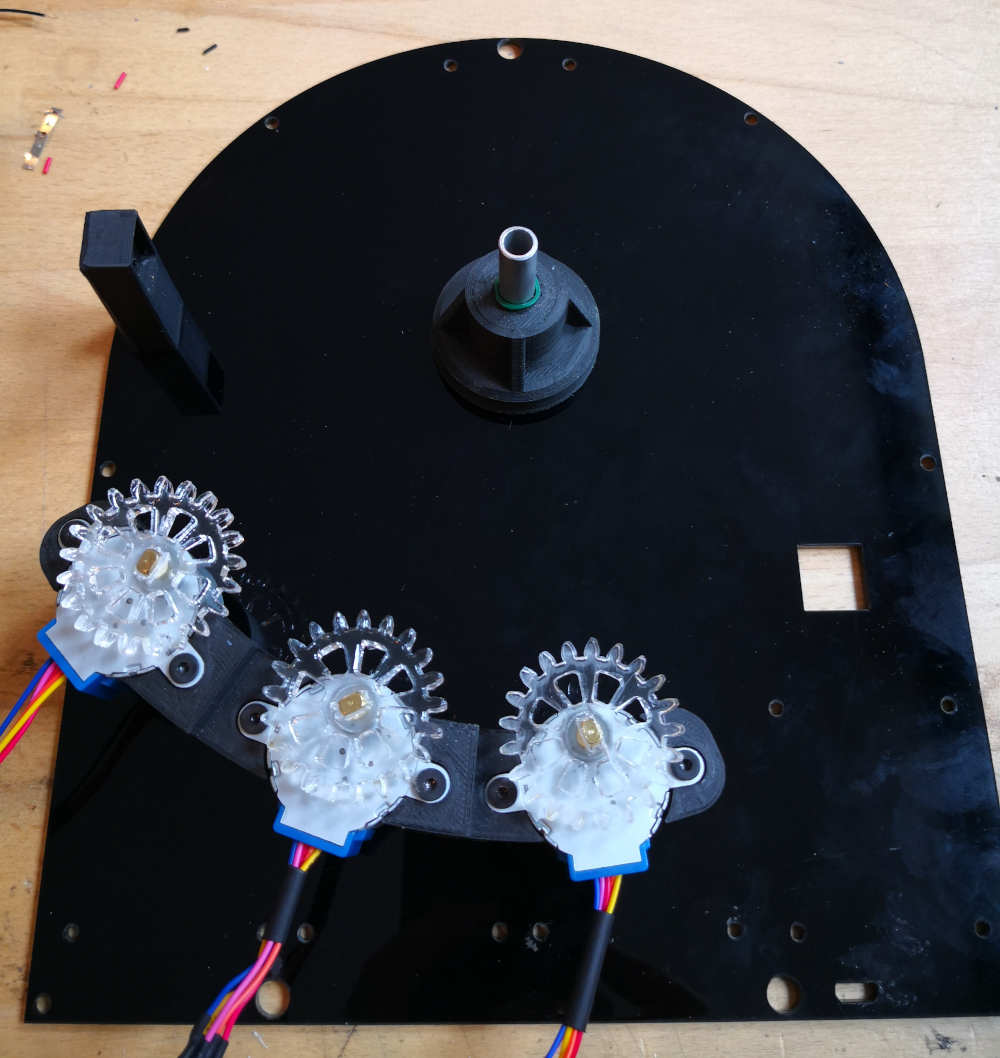
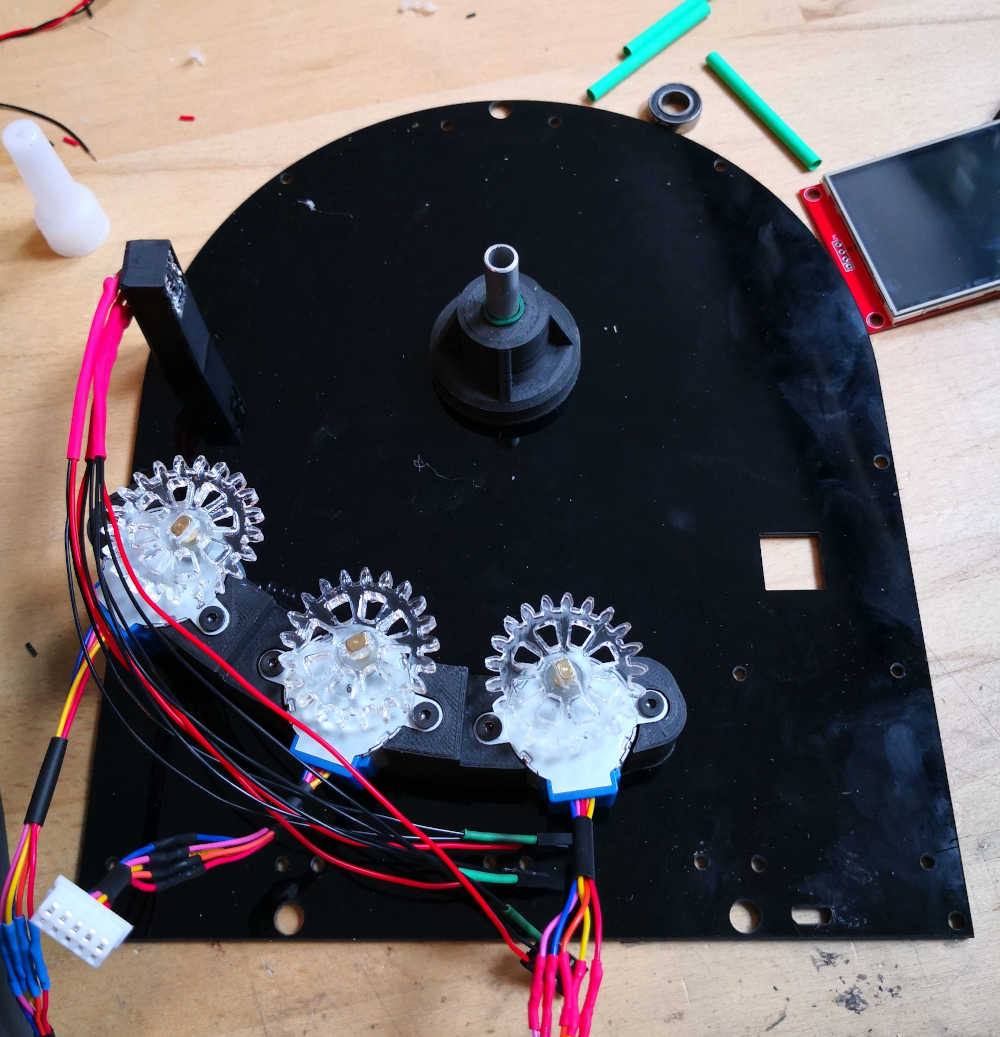
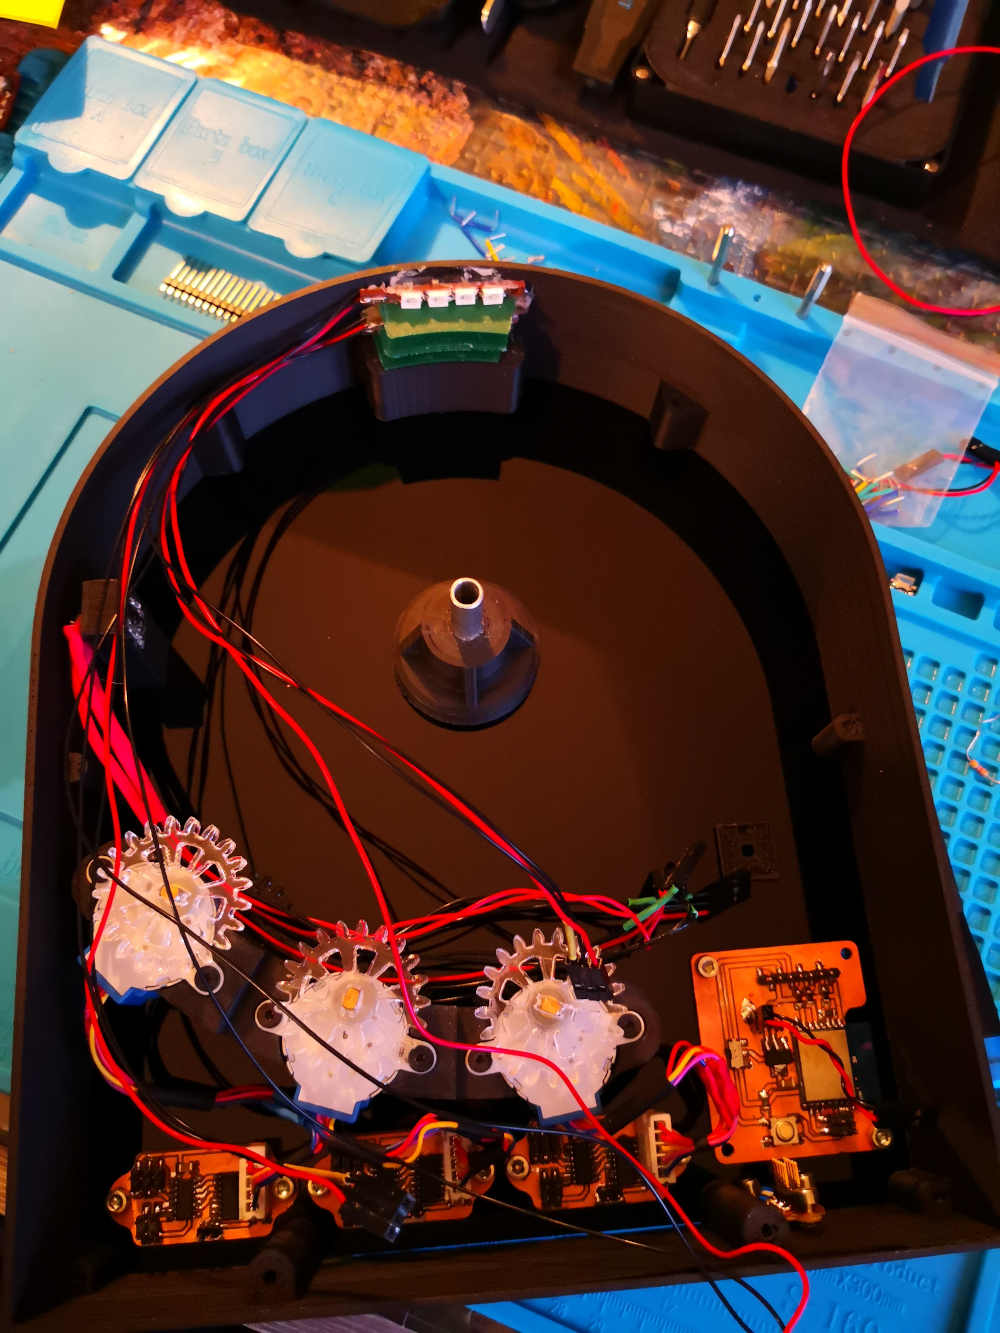
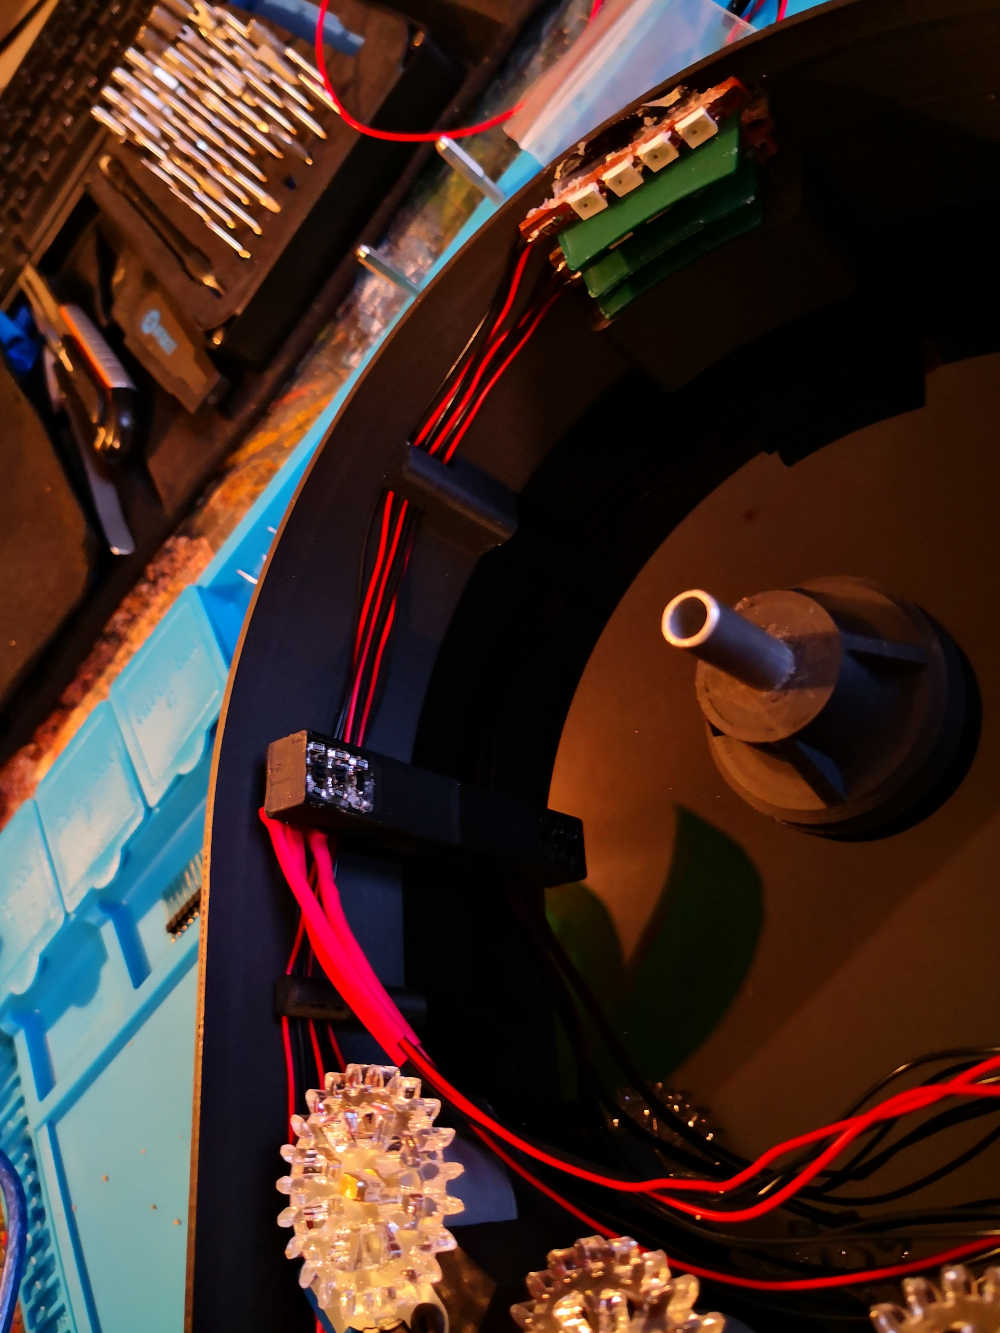
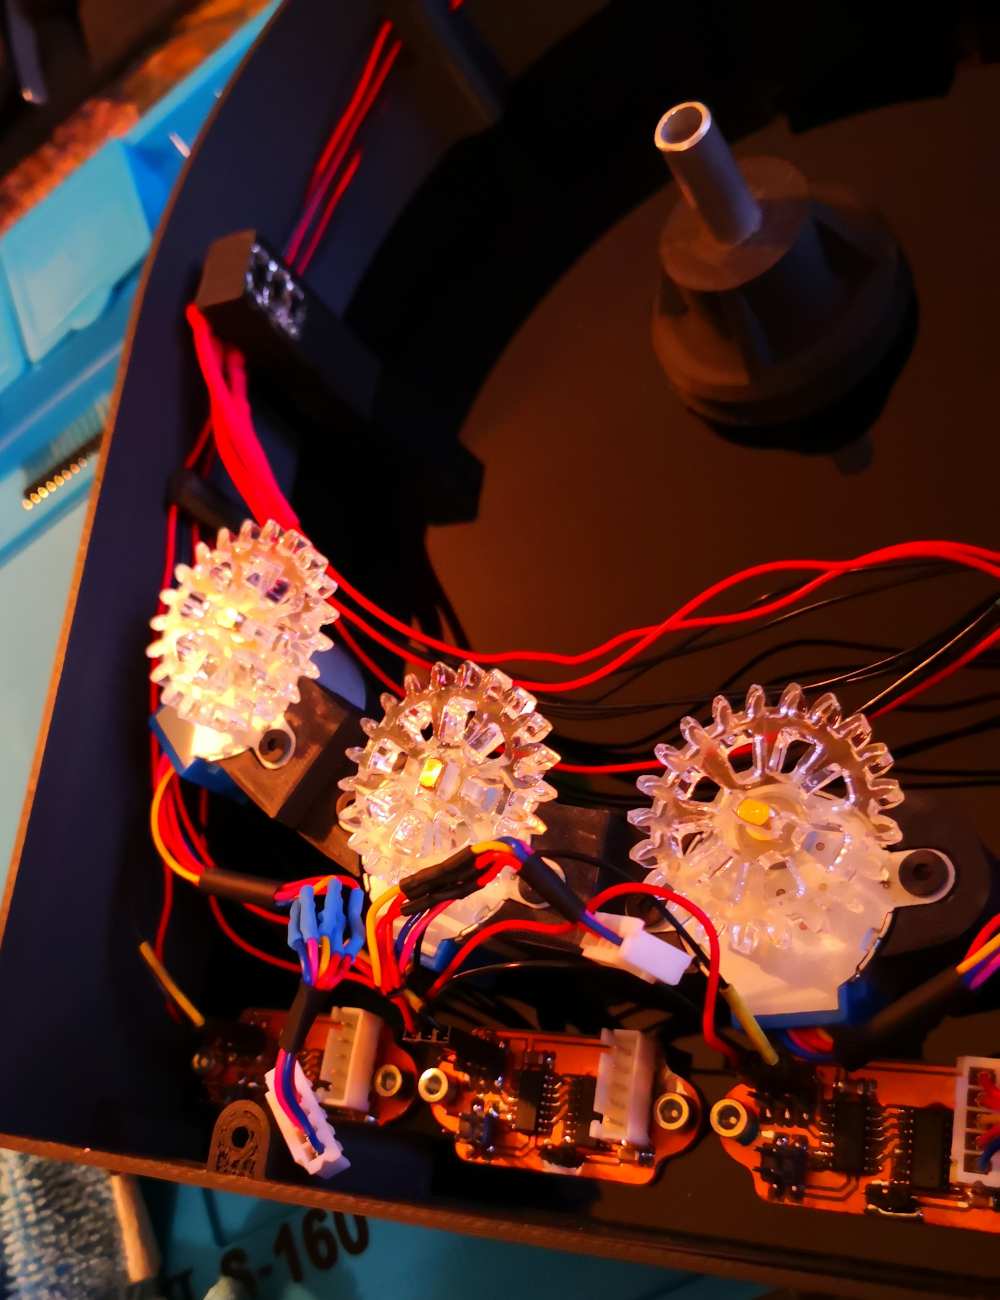
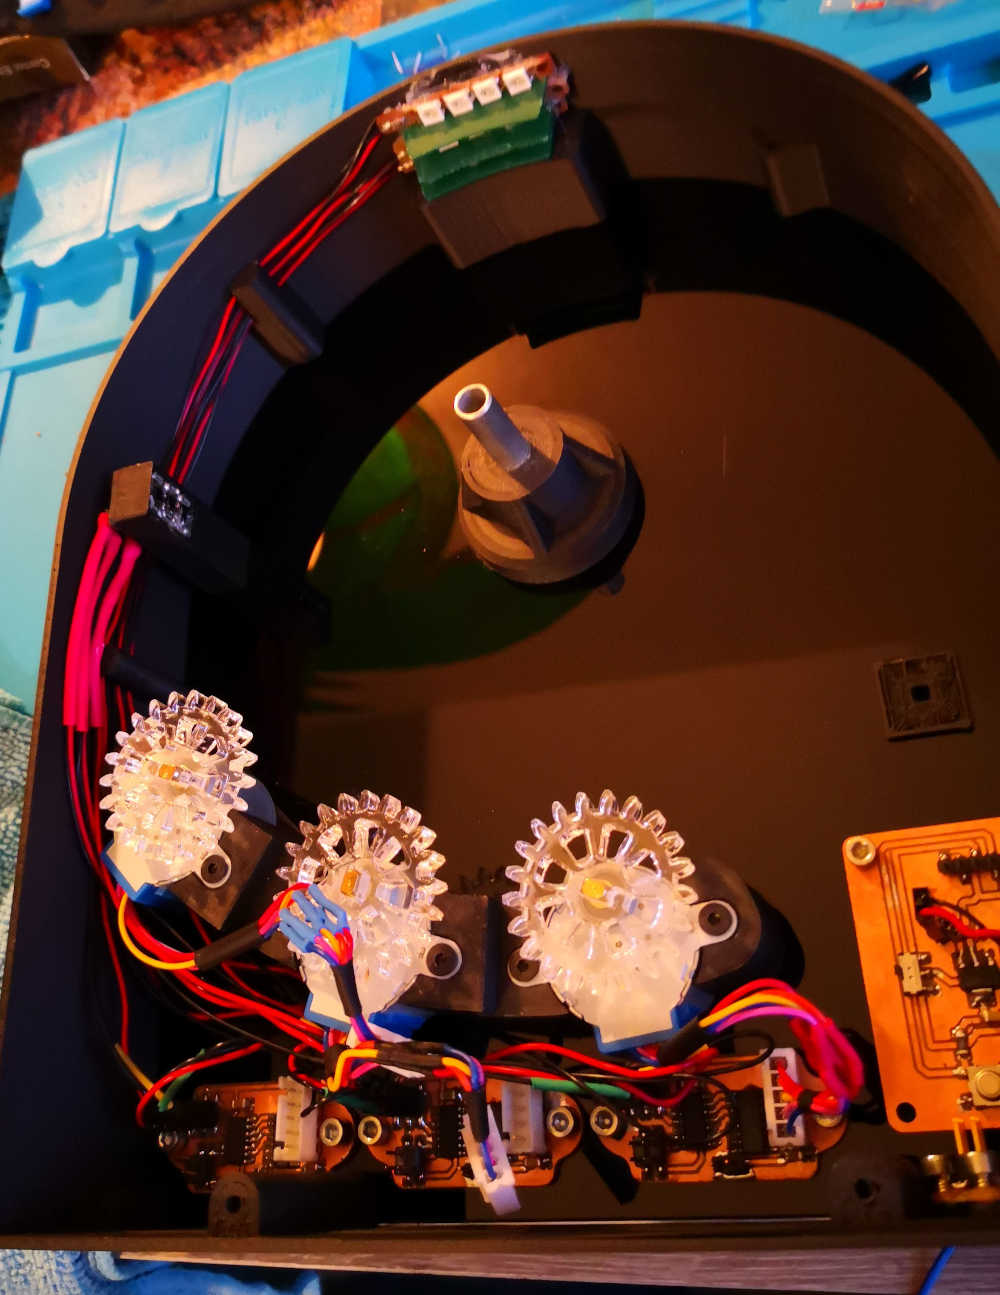
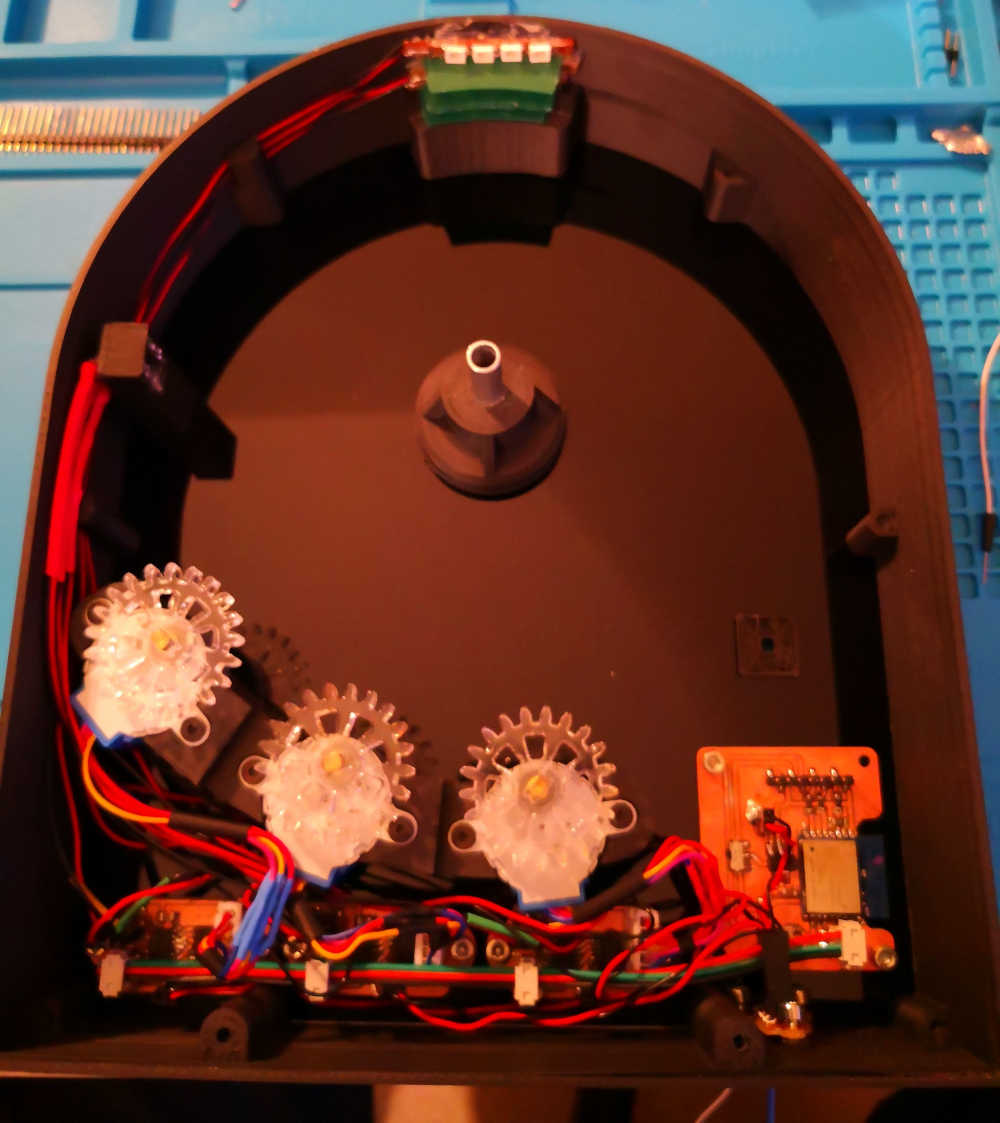
During the assembly & final programming process some issue occure, due to a number of connect & disconect for test and programming some pinheader start to be snatched off my boards

But i'm not anymore on the lab so for fix it i use some short jumper cable and a lot of hotglue to keep it in place
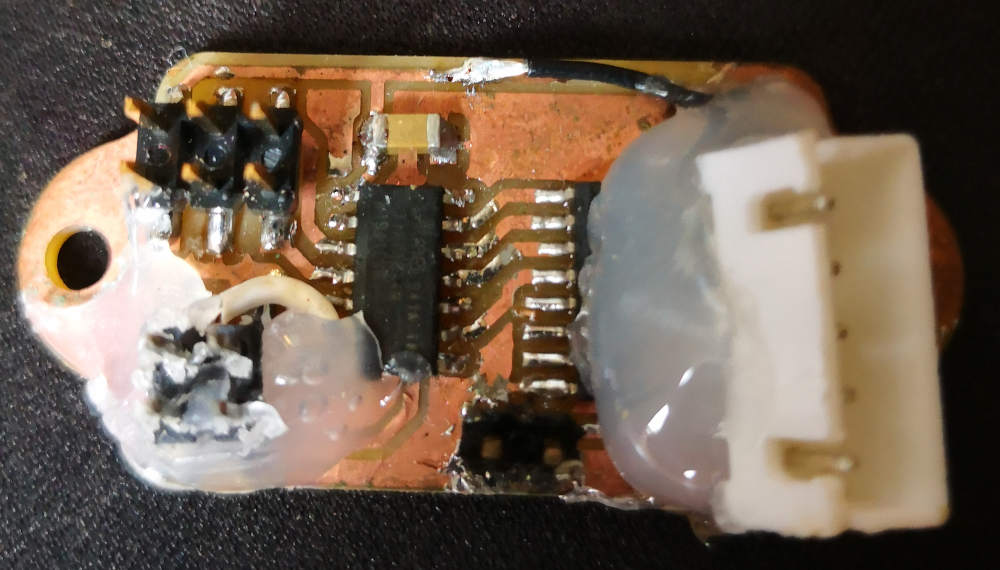
Not a pretty style but it's functional.....
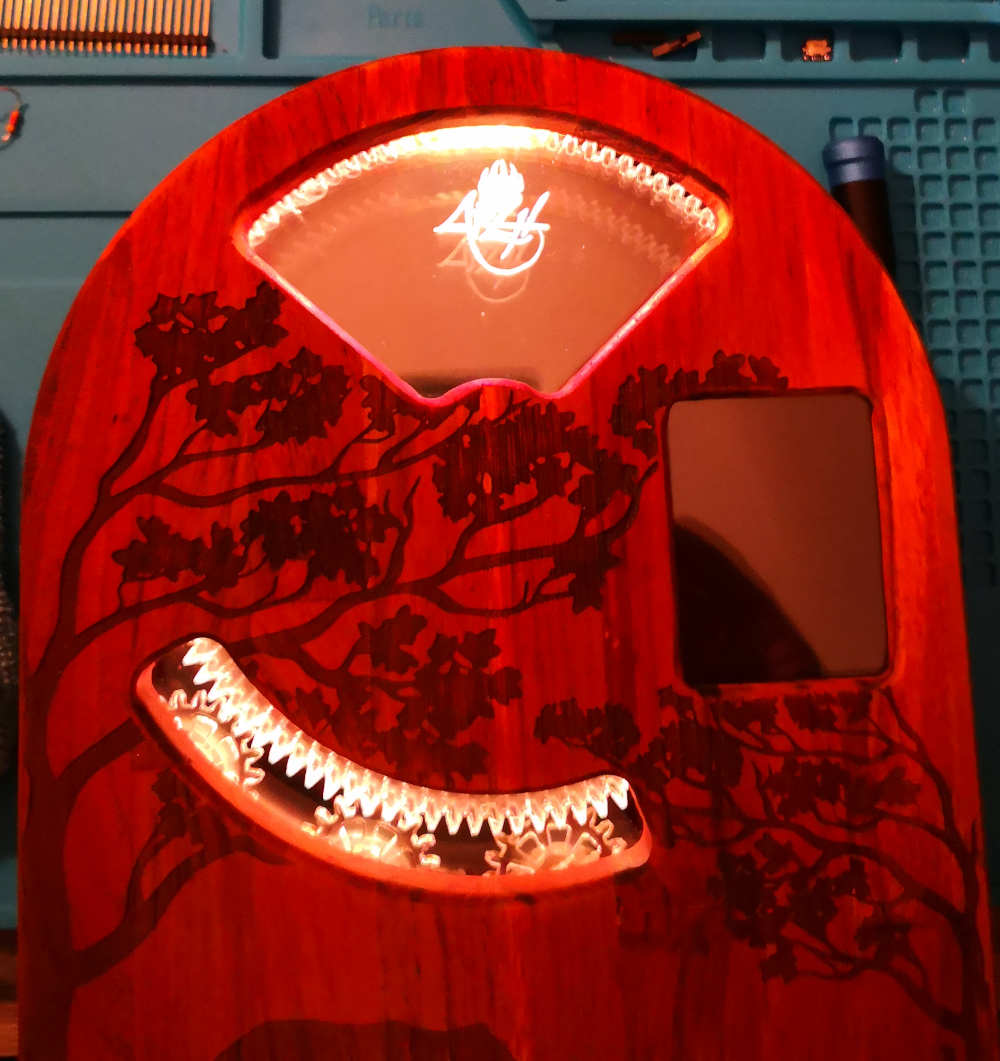
♦Final result:
On the next photos you could see the result of the supperposition of the 3 gears for a Sunny-cloudy-rainy days:


♦Bill of material:
Electronics parts :
| components | Where to buy? | Amount | Prices | Total prices |
|---|---|---|---|---|
| ESP Wroom 02 | Mouser | 1 | 2.71€/units | 2.71€ |
| ATTiny 1614 | Mouser | 3 | 0.60€/units | 1.80€ |
| WS2812B RGB LED | Mouser | 12 | 3.35€/10units | 4.02€ |
| EESY193 reflective photosensor | Mouser | 3 | 1.71€/units | 5.13€ |
| Si7020-A20 humidity & temperature sensor | Mouser | 1 | 2.30€/units | 2.30€ |
| 28BYJ-48 5V Stepper motor | Amazon | 3 | 13.99€/5units | 8.40€ |
| 1.44 inch TFT LCD display module | Aliexpress | 1 | 2.40€/units | 2.40€ |
| ULN2003ADR Darlington transistors | Mouser | 3 | 0.43€/units | 1.29€ |
| ZLDO 1117 regulator | Mouser | 1 | 0.42€/units | 0.42€ |
| Other (Capacitor / Resistor / Pinheader / cable) | 10€ | |||
Other components :
| Material | Where to buy? | Amount | Prices | Total prices |
|---|---|---|---|---|
| Volcano PLA | Formfutura | 300g | 37.08€/kg | 11.12€ |
| PMMA | localy | 900*400mm | 72€/1m2 | 26.69€ |
| Teak Wood | localy | 1/2 panel | 25.90€/panel | 12.95€ |
| 688-ZZ bearing | Banggod | 3 | 2.69€/10units | 0.81€ |
| 8mm aluminium tube (axis) | localy | 46mm | 4.05€/1m | 0.19€ |
| Other ( hot glue / screws ....) | localy | 5€ | ||